Essential CSS
JavaScript Roadmap
Learn JavaScript
Mastering Web Typography
Practical Astro
Understanding Async JS
Unorthodox Tailwind
API Masterclass
Build and Deploy
The Beginner Freelancer
Real World Node
Profile Billing Logout
Understanding Async JS
Lesson Plan
  1. Introduction
    1. What is Asynchronous JS?
    2. Callbacks are not automatically asynchronous
    3. What is an API?
    4. Evolution of HTTP APIs
    5. Ajax vs Asynchronous JavaScript
  2. Fundamental Concepts
    1. How to fetch resources
    2. Using XHR
    3. Using the Fetch API
    4. Using libraries
    5. Core JavaScript concepts
    6. Understanding Promises
    7. Understanding Async Functions
    8. Understanding the Event Loop
    9. Understanding JSON
    10. Async JS Best Practices
    11. Using Optimistic UI
  3. Understanding Rest API
    1. Diving into Rest APIs
    2. The Rest Architecture
    3. The Rest Structure
    4. Anatomy of a Request
    5. What's an endpoint
    6. Request methods
    7. Understanding request headers
    8. Understanding the request body
    9. Authentication
    10. Basic Authentication
    11. Bearer Authentication
    12. Authenticating with API keys and API Secrets
    13. Cross Origin Resource Sharing
    14. Anatomy of a response
    15. HTTP Statuses
    16. Response headers
    17. The response body
    18. Handling Errors
    19. Reading API documentations
    20. Understanding Curl
  4. Node Basics
    1. Why we are using Node
    2. Command Line Basics
    3. Installing Node
    4. Managing dependencies
    5. Using ES Modules in Node
    6. Using Node
    7. Restarting the server automatically
    8. Sending requests via Node
    9. Protecting API keys and secrets
  5. Building a server
    1. What's a server
    2. Building a simple server with Express
    3. Two kinds of servers
    4. API Server architecture
    5. Handling routes
    6. Understanding Middlewares
    7. Enabling CORS
    8. Receiving data
    9. Sending responses
    10. Handling errors in Express
    11. Using the server as a proxy
    12. Minimum viable server
  6. Open Authorization
    1. Open Authorisation (OAuth)
    2. Authenticating with Access Tokens
    3. Obtaining Access Tokens
    4. Public and Confidential Clients
    5. Authorisation Code Grant
    6. Understanding scope
    7. Proof Key for Code Exchange (PKCE)
    8. PKCE with Twitter
    9. Dynamic state and `code_verifier`
    10. Saving the access token in cookies
    11. Passing access tokens to the browser
    12. Saving the access token in local storage
    13. Refresh Token Grant
    14. Device Code Grant
    15. Client libraries vs REST
  7. Building Social Media Logins
    1. Introduction
    2. Starter Files
    3. Creating SSL certificates
    4. Login in with Github
    5. Github: Saving the token to local storage
    6. Github: Persisting the login status
    7. Login with Twitter
    8. Twitter: Saving the token to local storage
    9. Twitter: Persisting the login status
    10. Twitter: Refreshing the access token
    11. Login with Facebook
    12. Facebook: Saving the token to localStorage
    13. Facebook: Persisting the login status
    14. Facebook: Refreshing the access token
    15. Login with google
    16. Google: Saving the token to localStorage
    17. Google: Refreshing the access token

Twitter: Saving the token to local storage

Before we can save the token to Local Storage, we need to send the token to the browser.

We’re going to use the query string method to be consistent with what we have done with Github.

Sending token to frontend via the query string

First, we need to determine which values we need to send to the frontend.

From the Github lesson, you already know we need to send at least three values:

  1. authStatus — so we know whether the authentication is successful
  2. provider — so we know it’s from Github and not other identity providers.
  3. access_token — so we know can save the access token in Local Storage.

Let’s take a look at the token Twitter sends back to us and see if we need to include more values.

We can see that expires_in is 7200 minutes. This means the access token will expire in 2 hours. We need to send this value to the frontend so we know whether the access token has expired.

But we cannot use the 7200 value because that’s a relative number. We need to convert it to an exact date before we send it to the frontend.

const expiresAt = token.expires_in * 1000 + Date.now()

We also need to send the refresh_token to the frontend because we don’t have a database to save the refresh_token in this app.

Note

In an actual app, you would NOT want to send the refresh_token to the frontend to minimize security vulnerabilities. You want to keep the refresh_token in the database instead.

So in this case we need to send five values:

  1. authStatus
  2. provider
  3. access_token
  4. expiresAt
  5. refresh_token

Here’s how you can do this.

router.get('/auth/github/callback', async (req, res) => {
// ...
const token = response.body
const expiresAt = token.expires_in * 1000 + Date.now()
// Sends the token to the browser to be stored in Local Storage
const params = {
authStatus: 'success',
provider: 'twitter',
expiresAt,
access_token: token.access_token,
refresh_token: token.refresh_token,
}
const query = new URLSearchParams(params).toString()
res.redirect('/' + '?' + query)
})

Getting the token from query parameters

We need to get the refresh_token and expiresAt values from the query string as well. So let’s add them to save-token.js.

if (searchParams.get('authStatus') === 'success') {
// ...
const refreshToken = searchParams.get('refresh_token')
const expireAt = searchParams.get('expiresAt')
// ...
}

Saving the tokens

We can save the information in local storage like this:

if (searchParams.get('authStatus') === 'success') {
// ...
localStore.set(provider, { accessToken, refreshToken, expiresAt })
}

You should be able to see these three values for Twitter in your local storage.
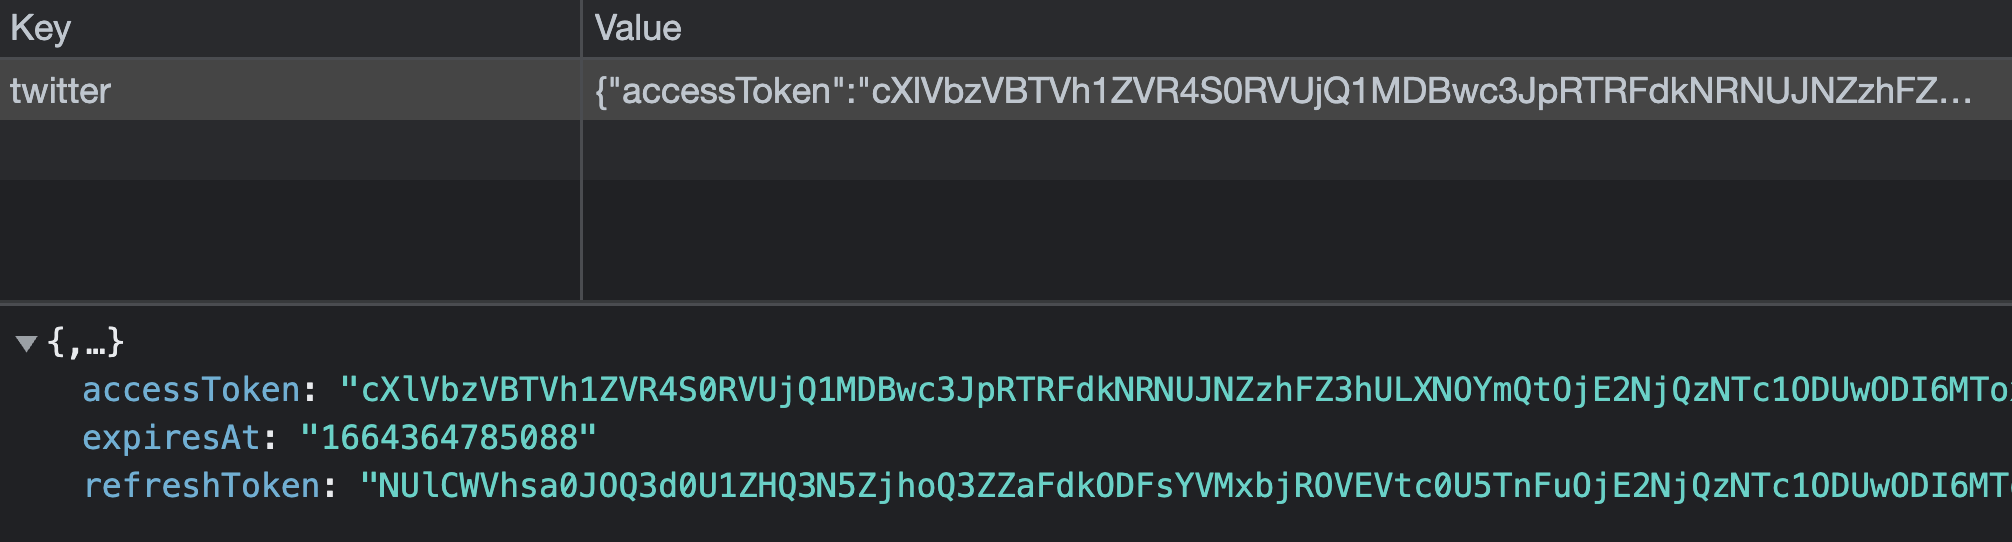
We are done saving the token. Let’s move on to the next step.