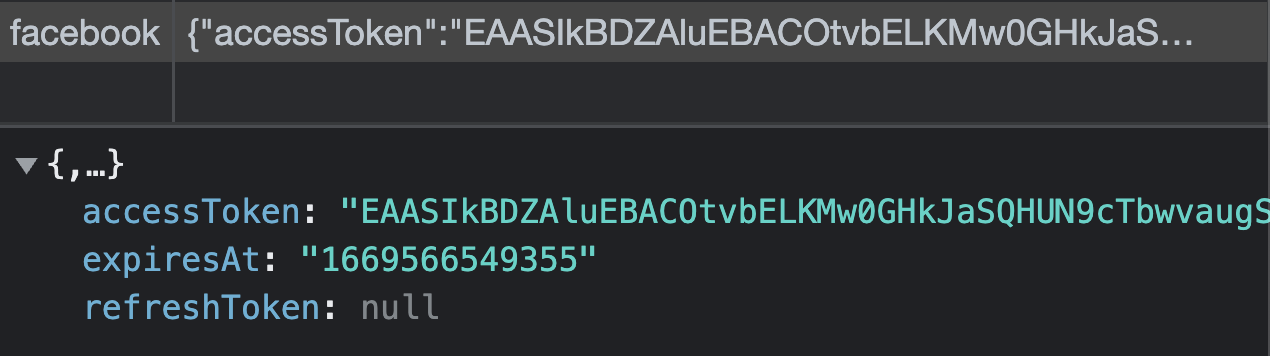
We know that Facebook has an access token that lasts for a long time — 5183280 seconds (which is approximately 60 days).
Previously, we can invalidate Twitter’s access token since we can use the refresh token to generate a new access token.
But with Facebook, we have a different problem — we cannot invalidate the access token because there is no refresh token to use!
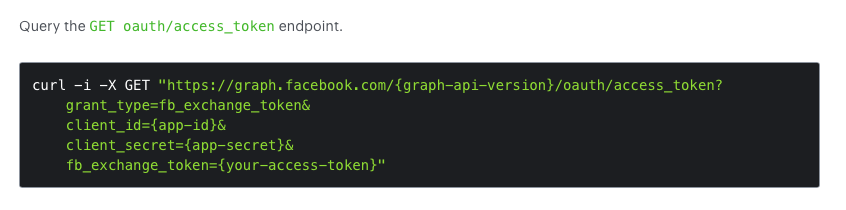
After digging around Facebook’s documentation, I found that you can generate a new access token with the current access token.
Further, under the caveats, we can see that you cannot use an expired token to request for a new access token.
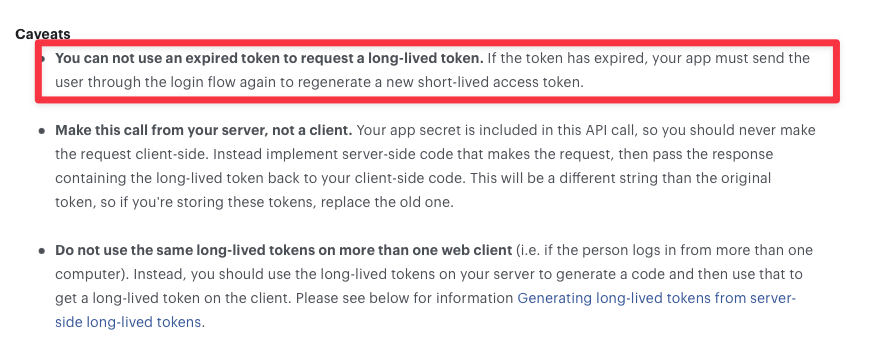
This means:
- We cannot change
accessToken— because we cannot generate a new one without a validaccessToken - We cannot change
expiresAt— because Facebook does not let you generate a new access token with an expired access token.
If we really want to update the access token, we need a valid access token to work with. We can:
- Update the access token on every single page load — which is a bit excessive…
- Update the access token once a day — this is what Facebook does in their SDK.
- Or update the access token a couple of days before it expires — this is not ideal because the user may not log in for the last few days.
We’ll follow Facebook’s implementation.
Refreshing the access token
In persist-state.js, we need to make sure Facebook’s access token code is able to get to the /auth/provider/refresh even though the access token is still valid.
We can do it with the following code:
providers.forEach(async provider => {  // ...  // For Facebook, we need to refresh the token every day so it needs to continue on to the next step. For everything else, we can stop here.  if (isValid && provider !== 'facebook') return
  const { response } = await zlFetch.post(`/auth/${provider}/refresh`, {    /**/  })  // ...})
We need to pass Facebook’s access token to the /auth/facebook/refresh endpoint.
providers.forEach(async provider => { // ... const { response } = await zlFetch.post(`/auth/${provider}/refresh`, { body: { refreshToken, accessToken }, returnError: true, }) // ...})We continue to send a refreshToken because we need it to refresh Twitter’s
access token. We’ll handle the difference in data in our backend.
Now we need to create the /auth/facebook/refresh endpoint in our backend.
router.post('/auth/facebook/refresh', async (req, res) => { // ...})And we can refresh the access token with the following code:
router.post('/auth/facebook/refresh', async (req, res) => {  const { accessToken } = req.body
  const { response, error } = await zlFetch(    'https://graph.facebook.com/oauth/access_token',    {      query: {        grant_type: 'fb_exchange_token',        client_id: process.env.FACEBOOK_CLIENT_ID,        client_secret: process.env.FACEBOOK_CLIENT_SECRET,        fb_exchange_token: accessToken,      },      returnError: true,    },  )
  console.log(response.body)
  // ...})
Here’s what Facebook returns when we send the above request:

This part should be simple for you now. We can need to send the access token and expiresAt to the frontend… and we can do it with the following code.
router.post('/auth/facebook/refresh', async (req, res) => {  // ...
  if (response) {    const token = response.body    const expiresAt = token.expires_in * 1000 + Date.now()
    const params = {      expiresAt,      accessToken: token.access_token,    }
    res.json(params)  }
  if (error) {    res.status(error.status).json({ error: error.message })  }})
If you do this correctly… Facebook should now have a new access token when you refresh the page.
The next step is to refresh the token once a day
Refreshing the token once a day
We need to check whether we should refresh the facebook token before we send the request to refresh the token.
providers.forEach(async provider => {  // ...
  // Code to check whether we should refresh  // facebook token should go here
  // And we refresh the token here  const { response } = await zlFetch.post(`/auth/${provider}/refresh`, {    body: { refreshToken, accessToken },    returnError: true,  })  // ...})
There are a couple of conditions to check this. The easiest and cleanest way is to check the code through a separate function. We’ll create a function called shouldRefreshFacebookToken and use it.
providers.forEach(async provider => {  // ...
  // Check whether to refresh Facebook's access token  const shouldRefreshFBToken = shouldRefreshFacebookToken()  if (provider === 'facebook' && !shouldRefreshFBToken) return
  // And we refresh the token here  const { response } = await zlFetch.post(`/auth/${provider}/refresh`, {    body: { refreshToken, accessToken },    returnError: true,  })  // ...})
There are a couple of things we need to check in shouldRefreshFacebookToken.
First, we need a way to know when we last checked the token. This means we can save the data in a new local storage key. If we saved it, we should be able to retrieve it with localStore
If we did not save the last checked date to local storage, it means we have not refreshed to the token yet — and we should refresh the token.
function shouldRefreshFacebookToken() { const lastCheckedDate = localStore.get('facebook_refresh_last_check_date') if (!lastCheckedDate) return true}Before we return true, we need to make sure we update the last checked date — so we can use it for future checks.
function shouldRefreshFacebookToken() {  const lastCheckedDate = localStore.get('facebook_refresh_last_check_date')
  const now = Date.now()  localStore.set('facebook_refresh_last_check_date', now)
  if (!lastCheckedDate) return true}
Now we can proceed and check whether we’ve checked for a refresh within the last 24 hours.
- If we didn’t, we need to refresh the token.
- If we did, we don’t have to refresh the token.
function shouldRefreshFacebookToken() {  // ...  // Refresh Facebook token every 24 hours  const oneDay = 1000 * 60 * 60 * 24 // 1 day in milliseconds  if (now - lastCheckedDate >= oneDay) return true
  // If we checked in the last 24 hours, we don't need to refresh the token  return false}
Try refreshing your browser multiple times. You should see the last checked date change, but the Facebook access token should not change.
We’re done with Facebook.
Let’s go refactor some code before we proceed to the final identity provider.
Welcome! Unfortunately, you don’t have access to this lesson. To get access, please purchase the course or enroll in Magical Dev School.
Unlock this lesson