We’re going to perform a PKCE flow with Twitter.
Before we begin, please follow the instructions here to create a Twitter App. Twitter will ask you for a bunch of information. Just write you’re learning to use the API every box. You’ll get immediate access once you complete the form.
Creating a Twitter App
When you’re in the developer portal, create a “Project”. Then, create an “App” in the project.
Go back to the dashboard when you’re done with the process and you should get a screen like this:
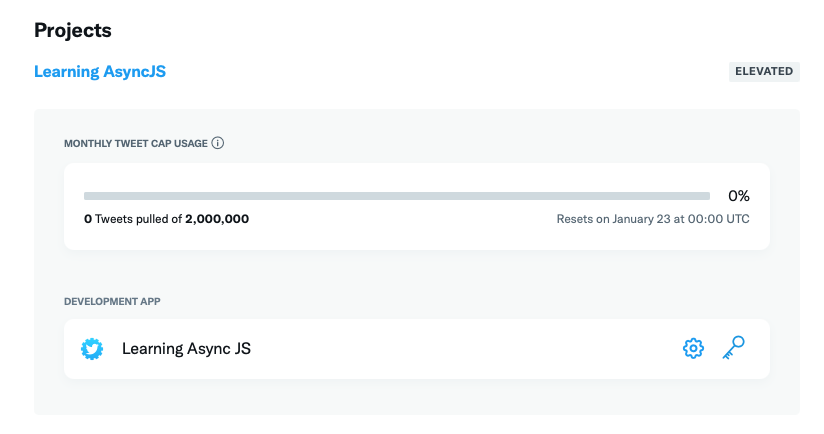
Click on your app and you should be able to setup Authentication settings. Click on Set up, then turn on OAuth 2.0.
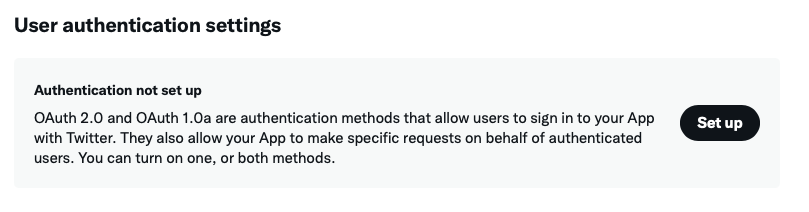
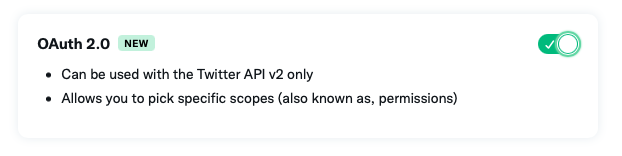
We’ll add http://127.0.01:3000/auth/twitter/callback as the callback URL. 127.0.0.1 is synonymous with localhost. We use 127.0.0.1 because Twitter mentioned not to use localhost.

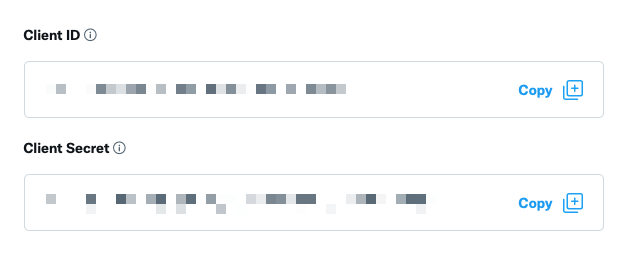
When you’re done, you should see a page with your client_id and client_secret. Save these values somewhere.
You’ve created the app and you’re now ready to perform a PKCE flow.
PKCE Flow with Twitter
The information needed from Twitter for the PKCE flow can be found in two links — this and this.
Note: Twitter’s documentations are harder to read compared to Github’s documentation. Take your time if you’re reading through the above links.
Step 1: Create the Sign in link
First, we need to create the sign-in link. Twitter gave an example that looks like this:

This link looks complicated. If you pay attention to the structure, you’ll discover there are a few key points:
- The endpoint is
https://twitter.com/i/oauth2/authorize - It requires a
scopeparameter - It requires the following parameters:
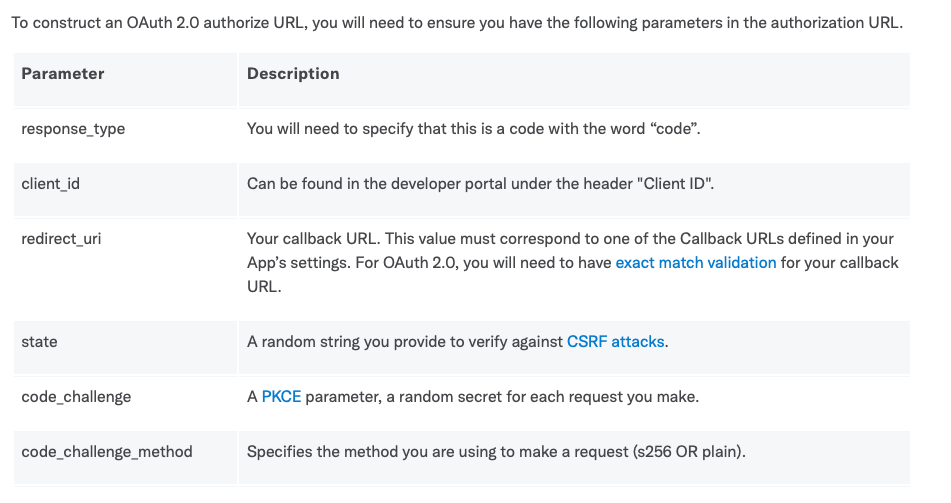
There are many parameters here so let’s take things slow.
The Scope Parameter
Twitter requires a scope parameter for the sign-in link. You can see a list of scopes here.
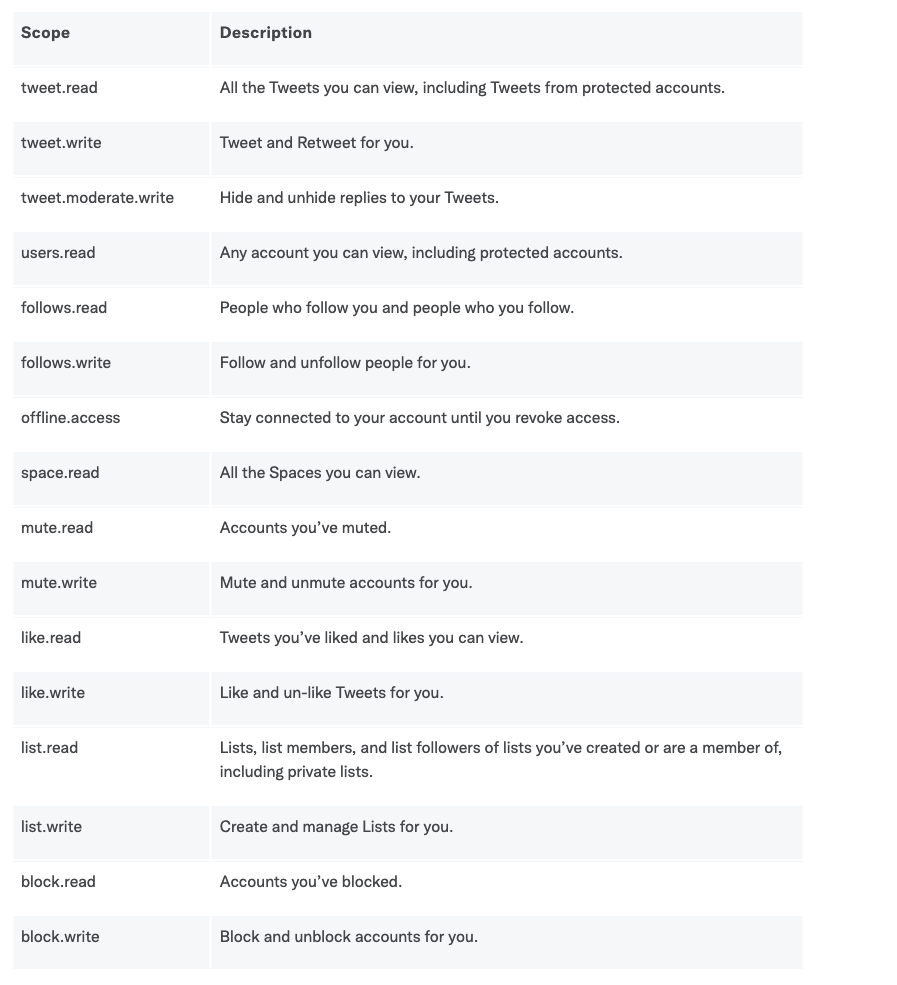
We’ll set scope to tweet.read for now.
const params = { scope: 'tweet.read',}Other Parameters
We have to add six more parameters to the sign-in link. The first three are the easy ones:
response_type— we set this tocodeclient_id— we can get this from the Appredirect_uri— we need to provide same value we used for the callback url.
const params = { scope: 'tweet.read', response_type: 'code', client_id: 'CLIENT_ID', redirect_uri: 'https://localhost:3000/auth/twitter/callback',}The next three require a bit more explanation:
state— this is a random string used to prevent Cross-site request forgery (CSRF) attacks. You need to provide the samestatevalues in Step 1 and 4.code_challangeandcode_challenge_method— we talked about these in the previous lesson. We need to use the samecode_verifiervalues in Step 1 (to generatecode_challengeand in Step 4 (to send to the API).
We’ll discuss how to use the same state and code_verifier values in Steps 1 and 4 in the next lesson. For now, we’ll use the following hardcoded values:
- State:
12345 - Code verifier:
challenge - Code challenge:
LdAL134CIs7YgmZUganB2fkHMJ0W4F7QB6HqY5KEd6k - Code challenge method:
S256
const params = { // ... state: '12345', code_challenge: 'LdAL134CIs7YgmZUganB2fkHMJ0W4F7QB6HqY5KEd6k', code_challenge_method: 'S256',}Combining everything
We can combine the endpoint and params to generate the sign-in link:
const baseURL = 'https://twitter.com/i/oauth2/authorize'const params = {  /* ... */}
const query = new URLSearchParams(params)const link = baseURL + '?' + query.toString()console.log(link)
You should get a link like this. (Please replace CLIENT_ID with your client id)
https://twitter.com/i/oauth2/authorize?response_type=code&client_id=CLIENT_ID&redirect_uri=https%3A%2F%2Flocalhost%2Fauth%2Ftwitter%2Fcallback&state=12345&code_challenge=LdAL134CIs7YgmZUganB2fkHMJ0W4F7QB6HqY5KEd6k&code_challenge_method=S256&scope=tweet.readYou can get your users to visit this link by sending them to a route, then redirecting the user from that route.
<a href="/auth/twitter">Login to Twitter</a>app.get('/auth/twitter/', (req, res) => { // ... res.redirect(link)})Step 2: User signs in to Twitter
If you click the link you should see this page.
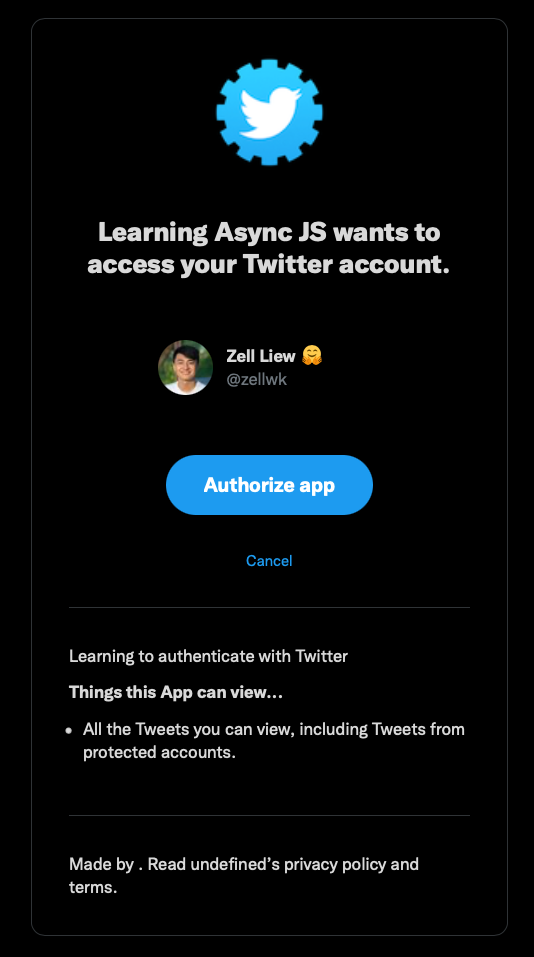
Simply authorise the app to move on to the next step.
Step 3: Twitter redirects the users to the callback url
Twitter sends along two parameters — state and code when it redirects the user back to the callback url. We can get these values through req.query.
router.get('/auth/twitter/callback', async (req, res) => { const { state, code } = req.query console.log(state) console.log(code)})
We need to check if the returned state value matches the same one we created.
- If the values are the same, it means the request originated from us and we can proceed.
- If the values are not the same, the request originated elsewhere and we should not proceed.
app.get('/auth/twitter/callback', async (req, res) => { const { state, code } = req.query if (state !== '12345') return})Step 4: Using code to request for an access token
Twitter requires us to do a few things here:
- We need to send a POST request to
https://api.twitter.com/2/oauth2/token - We need to perform Basic Authentication with
client_idas the username andclient_secretas the password. - We need to set
Content-Typetoapplication/x-www-form-urlencoded - We need to pass in five parameters —
code,grant_type,client_idandredirect_uri, andcode_verifier.
Here’s how we get the values we need:
client_id— you should already have thisclient_secret— get from the App in Twitterredirect_uri— you should already have thisgrant_type— set this toauthorization_codecode— get this from the query parameter sent to the callback urlcode_verifier— set this tochallengesince we hardcoded thecode_challengeearlier.
Here’s the request we need to send.
app.get('/auth/twitter/callback', async (req, res) => {  // ...  const response = await zlFetch.post(    'https://api.twitter.com/2/oauth2/token',    {      auth: {        username: 'CLIENT_ID',        password: 'CLIENT_SECRET',      },      headers: {        'Content-Type': 'application/x-www-form-urlencoded',      },      body: {        client_id: 'CLIENT_ID',        redirect_uri: 'https://localhost/auth/twitter/callback',        grant_type: 'authorization_code',        code: code,        code_verifier: 'challenge',      },    },  )
  console.log(response.body)})
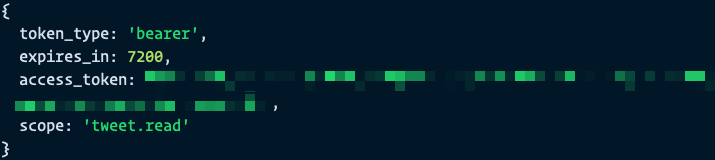
You should get a response like this:
Step 5: Save the token for subsequent requests
Again, you can save the access token in the browser or the database. We’ll talk about this in detail in a later lesson.
Notice Twitter returns an expires_in value together with the access token. This value tells us when the token expires. It should be saved together with the access token so we know whether it has expired.
We’ll talk about saving the expries_in value as we talk about saving the token.
Welcome! Unfortunately, you don’t have access to this lesson. To get access, please purchase the course or enroll in Magical Dev School.
Unlock this lesson