Before we write code for the refresh token, we need to invalidate Google’s access token. When we do this, the code we have written so far will automatically direct send a request to the /auth/google/refresh/ endpoint.
We can invalidate Google’s access token by changing the access token.
Refreshing the access token
We can refresh the access token by sending a request to Google. Here are the instructions from Google on how to do this.
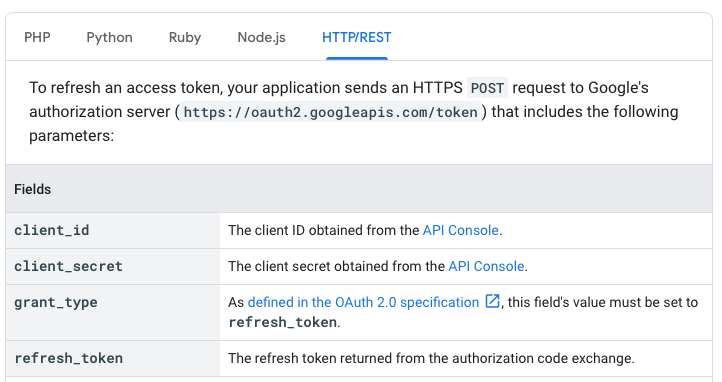
This means we must send the following request:
router.post('/auth/:provider/refresh', async (req, res) => { // ... if (provider === 'google') { apiResponse = await zlFetch.post('https://oauth2.googleapis.com/token', { body: { client_id: process.env.GOOGLE_CLIENT_ID, client_secret: process.env.GOOGLE_CLIENT_SECRET, grant_type: 'refresh_token', refresh_token: refreshToken, }, returnError: true, }) } // ...})Pay attention here.
If you console.log the response that comes back from Google, you will notice that there is no refresh_token again! (Feel free to curse and swear at this point 😜).
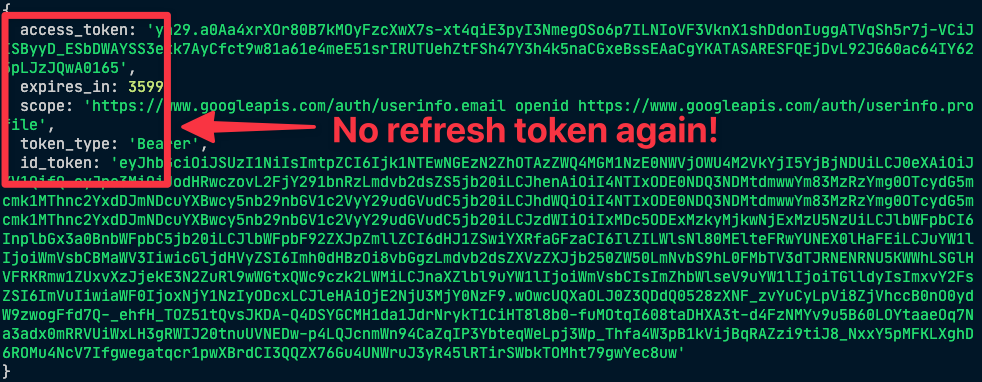
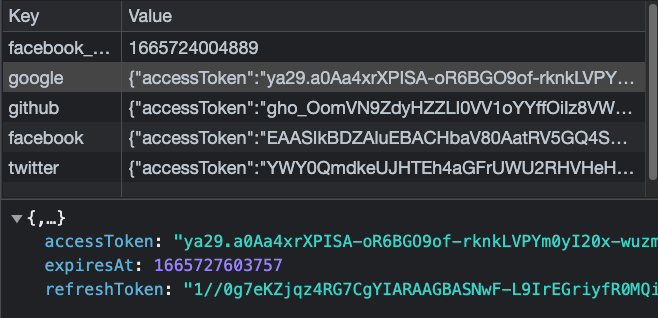
The code we have sends an undefined value to the frontend as the access token… so we need to update persist-state.js to use the previous refresh_token value if there is one.
This is very simple.
We’ll first grab the new refresh token value if it’s available. If it is not available, we’ll use the OR operator to grab the old refresh token value we retrieved from local storage.
providers.forEach(async provider => { // ... // Save token with response const newToken = response.body localStore.set(provider, { accessToken: newToken.accessToken, refreshToken: newToken.refreshToken || refreshToken, expiresAt: newToken.expiresAt, }) // ...})Now we will only update the accessToken and expiresAt in the local storage. The refreshToken value will remain.
(You may have to revoke the login and redo the entire process to see it in action).
Welcome! Unfortunately, you don’t have access to this lesson. To get access, please purchase the course or enroll in Magical Dev School.
Unlock this lesson