You use authorisation code grant when you want to let users login with an identity provider like Github, Facebook, Twitter, Google, etc.
The process (or flow) looks like this:
- We create a “Sign in with XX” link for users
- Users click the link and sign in to the provider
- The provider redirects the users to a
callback_url - We generate an access token from the
codevalue sent to the thecallback_url - We save the token for subsequent requests
You need the following to use the authorisation code grant:
- Create an app with the identity provider
- Have a server — this server is required for Step #4.
We’ll start this lesson by learning to create an app with the identity provider.
Creating an app with the provider
You need to tell an identity provider you want to use it for OAuth. You can do this by creating an “app” (which is an entry into their database) with the parameters needed for OAuth to work.
The instructions for creating the app depends on the provider you are using, so you have to look at the documentation for more details. For example, here are the instructions for Github and Twitter.
That said, the process for creating these apps are roughly the same. You need to:
- Sign up for a developer account with the provider
- Create an app in the provider’s website
- Set a name for your app
- Set a
callback_urlfor your app
The name and callback url are important parameters.
- Name — The name should be easily recognisable as users will see this name when they sign in.
- Callback url — Users will be redirected to this url after they sign in. You’ll need this for the flow.
Using the authorisation code flow
We will go through the authorisation code flow with Github. Before you continue, please follow these instructions and create an app with Github.
The important parameters are the name and callback_url like I mentioned above. In this case, I set the name and callback url to the following:
- Name:
Learning AsyncJS - Callback url:
https://localhost:3000/auth/github/callback
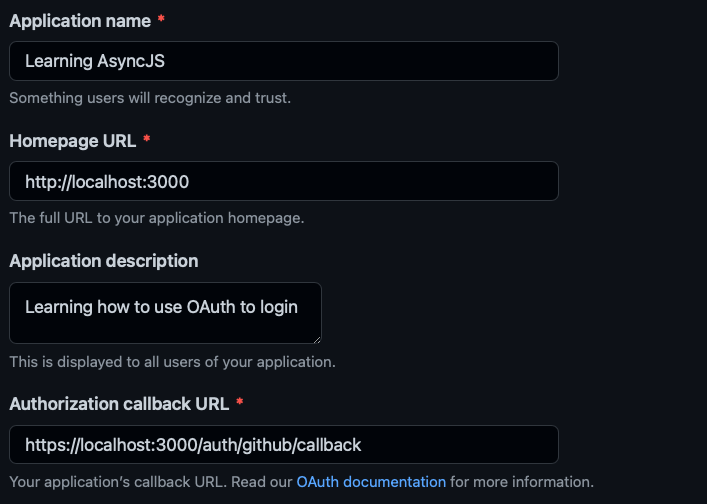
Note: We use localhost:3000 here because we want Github to redirect users to our local server. Make sure you set this to your app’s domain name for real-world usage.
Step 1: Creating a “Sign in” link
The first step is to create a link users can use to sign in with Github. The instructions can be found here.
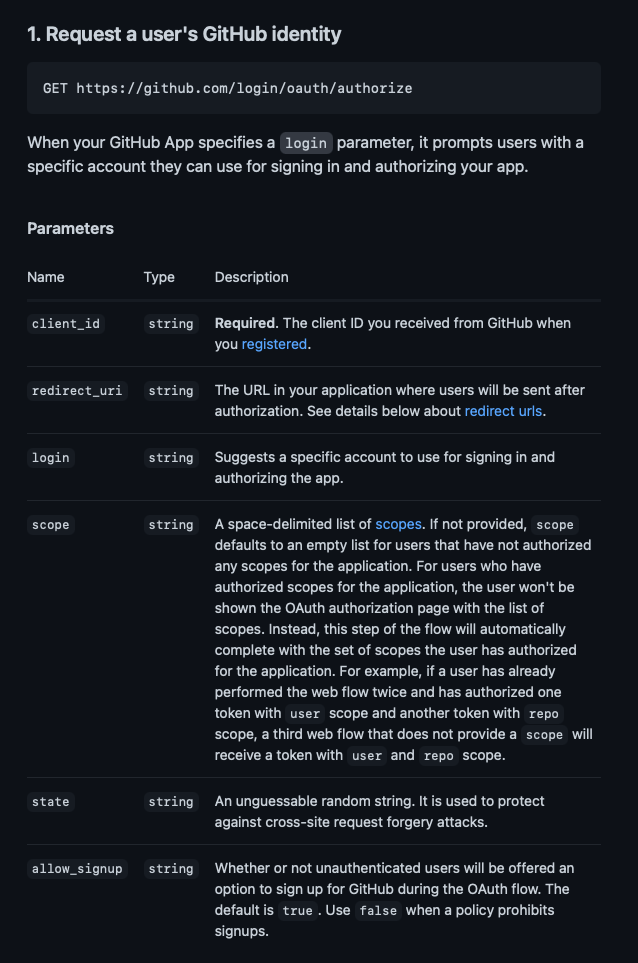
We can see two things here:
- The endpoint is
https://github.com/login/oauth/authorize client_idis a required parameter.
You can find the client_id in the app you registered.
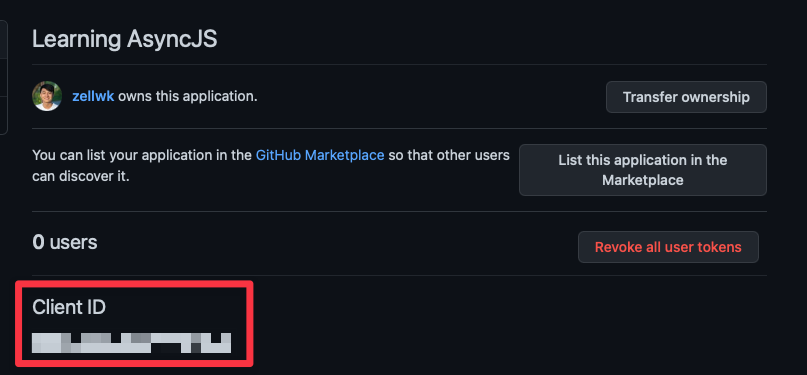
The sign-in url will be:
https://github.com/login/oauth/authorize?client_id=YOUR_CLIENT_IDNote: Different providers require different parameters. Always check the documentations to ensure you’re sending the parameters they need!
Step 2: Users click the link and sign in Github
You can get users to visit this link by sending them to a route. This route will redirect the user to the link we generated above.
<a href="/auth/github">Login with Github</a>app.get('/auth/github/', (req, res) => { res.redirect( 'https://github.com/login/oauth/authorize?client_id=YOUR_CLIENT_ID', )})If you visit the link you created, you should see the following page.
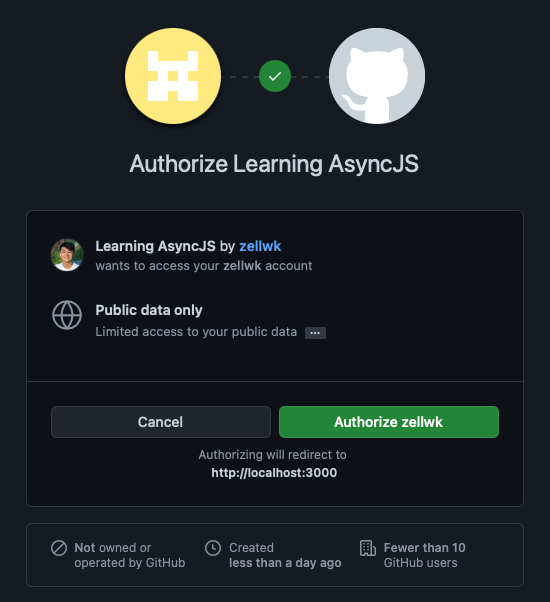
At this point, the user needs to click on the authorise button to sign-in with Github. If they do so, Github will redirect the user to the callback_url.
If the user cancels the sign-in request, the authorisation code flow will stop.
Step 3: Github redirects the user to our callback url
When Github redirects the user to the callback url, it provides us with a code query parameter. You can see the code parameter in your browser’s address bar.

This code value is a temporary verification for obtaining an access token. Each provider has a different expiration for this code value. Github’s code expires in 10 minutes. If the code value expires, you need get users to login to Github again.
Note: Most providers would return the code parameter. Check the documentations to be sure!
Step 4: Generating an access token from the callback url
We need to send a POST request to Github to request for an access token. The access token will be used for token authentication.
The instructions to do this with Github can be found here
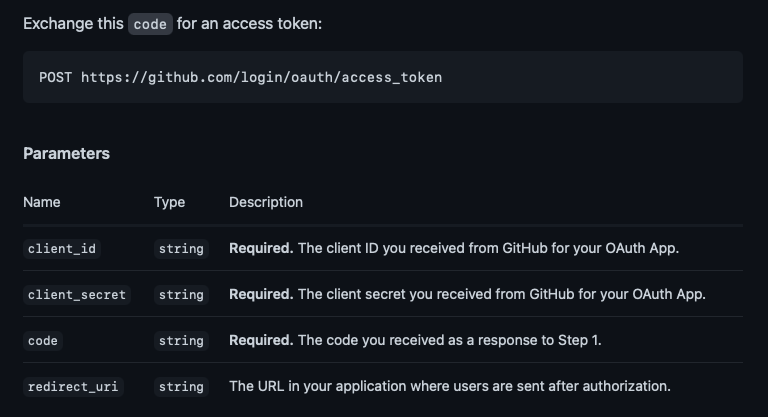
There are three required parameters in this request:
- The
client_id - The
client_secret codewhich we got from the above step
We already have the client_id from step 1.
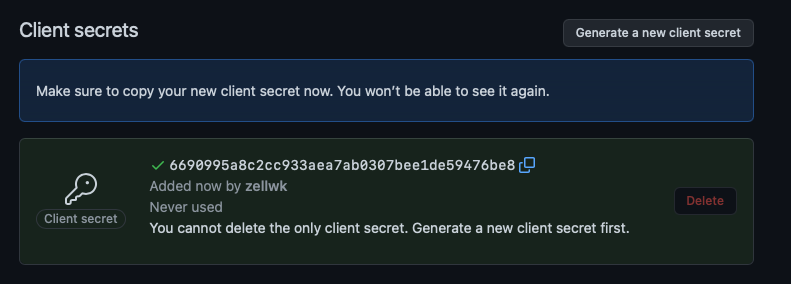
For client_secret, you need to generate a one inside your app in Github. You should get a screen like this after generating the secret.
- Make sure you copy this secret because you won’t see it again.
- Also make sure you don’t show this secret to anyone. (I’m showing you because I deleted it already).
Getting code is straightforward. It can be found in req.query when we handle the callback_url route.
app.get('/auth/github/callback', (req, res) => { const { code } = req.query})To get the access token, we send a POST request according to the instructions above. Make sure to include all three values in the body.
app.get('/auth/github/callback', async (req, res) => {  const code = req.query.code
  // Send POST to get access token  const response = await zlFetch.post(    'https://github.com/login/oauth/access_token',    {      body: {        client_id: clientID,        client_secret: clientSecret,        code,      }    }  )
  console.log(response.body)
If the request is successful, you should get an object with the access_token, scope, and token_type.
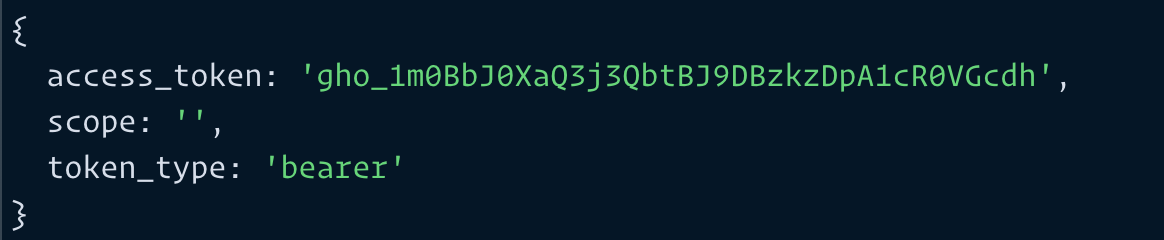
This access_token can be used for authentication.
Note: Github doesn’t require a grant_type parameter for this request, but some providers do. If they ask for it, you will most likely set grant_type to authorisation_code.
Step 5: Save the token for subsequent requests
The access_token can be used in the authorisation header for requests that require authentication.
Here’s is an example where we used the access token to get a list of repositories for the authenticated user.
// Using the access tokenzlFetch.post('https://api.github.com/user/repos', { auth: access_token,})You want to save this access_token so you can use it for subsequent requests without asking users to login again.
You can save it in two places:
- In the user’s browser
- In your database
You should save the token in the user’s browser if you let the user login to your app through the identity provider. Doing so allows you to authenticate the user silently upon each page request (which means they never have to sign in again). We’ll discuss how you save the token in the user’s browser in a later lesson.
You should save the token in the database if you only use it to help users access the API — you don’t need to let users login to your app through the identity provider. This keeps the token safe since the connection between servers and databases are secure.
Three legged auth
The Authorization Code Grant is also called a three-legged auth because it requires three participants:
- The user
- Your server
- The identity provider’s server
Welcome! Unfortunately, you don’t have access to this lesson. To get access, please purchase the course or enroll in Magical Dev School.
Unlock this lesson