When a user clicks on a hero in Heroes List, we want to direct the user to the hero’s page. This is what we want:
We do this by adding a href that links to the hero’s name, like this:
export default Tiny({  // ...  template() {    return `      <!-- Header -->
      <main tiny-listener="[filter-heroes, filterHeroes]">        <div class="wrap">          <!-- Title -->
          <div class="sidebar-content">            <!-- Filters -->
            <div class="content">              <ul class="heroes-list">                ${heroes                  .map(hero => {                    return `                    <li>                      <!-- Links to each hero here -->                      <a href="/heroes/${hero.npcHeroName}">                        <span class="hero__name"> ${hero.name} </span>                        <img src="${hero.image}" alt="${hero.name} image">                      </a>                    </li>                  `                  })                  .join('')}              </ul>            </div>          </div>        </div>      </main>    `  },})
Pay attention to the URL in the href property. We need this URL for the hero’s page to work.
Quick Note about the URL
For the URL, notice we used a url like /heroes/axe instead of /hero/axe? We used a plural form, not a singular form.
We do this because the API convention works this way. It’s usually a plural verb, followed by a singlular verb. Examples include:
/users/:username/posts/:postid
This is why we’re using /heroes/:heroname instead of the singular version. Just highlighting this cause I thought it’s something important you should know.
Detecting and displaying the Hero Page
If the URL is /, we know we should display the Heroes List. If the URL contains /heroes, we know we should display the Hero Page.
We can do this with a simple if statement.
Tiny({ // ... template() { const path = location.pathname if (path === '/') { return '<div tiny-component="HeroesList"></div>' } if (path.includes('/heroes/')) { return 'Hero Page!' } },})When you click on a hero, you should see the hero page content now.
We’re ready to make the Hero Page Component now.
Making the Hero Page component
The Hero Page Component can be pretty complex, so we’l start by creating a HeroPage folder. We’ll create a HeroPage.js file and put it inside this folder.
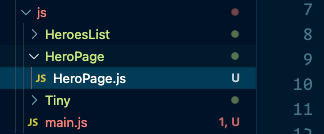
We have to do the usual stuff at this point:
- Import Tiny into
HeroPage.js - Export
HeroPageso we can use it inmain.js - Import
HeroPageintomain.js
import Tiny from '../Tiny/tiny.js'
export default Tiny({ template() { return 'Hero Page!' },})import HeroPage from './HeroPage/HeroPage.js'Tiny({ // ... components: { HeroesList, HeroPage, },
template() { const path = location.pathname // ... if (path.includes('/heroes/')) { return '<div tiny-component="HeroPage"></div>' } },})Creating Structure
We already have the HTML for the hero page, so the next step is to put the entire HTML into HeroPage.js.
While doing so, the first thing I noticed is the <body> element has the hero-page class.
<body class="hero-page"> ...</body>We cannot change the <body> class easily with Tiny, so we will wrap the entire component with a <div> with the same class.
export default Tiny({ template() { return ` <div class="hero-page"></div> ` },})We can now add the header. Make sure to change the image to an absolute URL by adding a / in front of the images/logo.png.
export default Tiny({ template() { return ` <div class="hero-page"> <header class="site-header"> <div class="wrap"> <div class="single-column"> <a href="/"> <img src="/src/assets/learn-javascript/logo.png" alt="Dota 2 Logo" /> </a> </div> </div> </header> </div> ` },})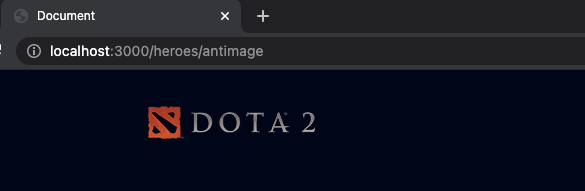
We can also add the main content which looks like this.
export default Tiny({  template() {    return `      <div class="hero-page">        <!-- Header -->
        <main>          <div class="wrap">            <div class="single-column flow-2">              <div class="clear site-title">                <h1 data-hero-name></h1>                <img                  class="hero__img"                  data-hero-image                  src="/src/assets/learn-javascript/transparent.png"                />                <p data-hero-description></p>              </div>
              <section hidden>                <h2>Abilities</h2>                <ul class="abilities flow" data-hero-abilities></ul>              </section>            </div>          </div>        </main>      </div>    `  },})
Nothing will show up for the content because we haven’t added data into it yet. We need to fetch the required data.
Fetching the required data
The Hero Page needs four kinds of data:
- Heroes
- Hero lore
- Abilities
- Hero abilities
We already retrieved the first data (heroes) in HeroesList. It makes sense to share this data with HeroPage. An ideal way is to fetch heroes data upfront in main.js, then pass this data into both HeroPage and HeroesList.
Passing Hero Data to HeroesList
We can shift the fetch request from HeroesList.js into main.js.
// Remove this from HeroesList.js.// Paste this in main.jsasync afterMount () {  const dotaApi = 'https://api.opendota.com/api'  const response = await zlFetch(`${dotaApi}/constants/heroes`)  const heroes = Object.values(response.body).map(hero => {    return {      name: hero.localized_name,      npcHeroName: hero.name.replace('npc_dota_hero_', ''),      attackType: hero.attack_type.toLowerCase(),      primaryAttribute: hero.primary_attr,      roles: hero.roles.map(role => role.toLowerCase()),      image: `https://api.opendota.com${hero.img}`    }  })
  this.setState({    heroes,    displayedHeroes: heroes  })}
We’ll remove displayedHeroes since the parent component in main.js doesn’t need it.
Tiny({ // ... async afterMount() { // ... this.setState({ heroes, // Remove this line displayedHeroes: heroes, }) },})We can pass the state.heroes into HeroesList like this:
Tiny ({ // ... template () { const path = location.pathname if (path === '/') { return '<div tiny-component="HeroesList" tiny-props="[heroes, state.heroes]"></div>' } // ...})We can now get heroes inside HeroesList with prop.
export default Tiny({ // ... template () { console.log(this.props.heroes) // ... }}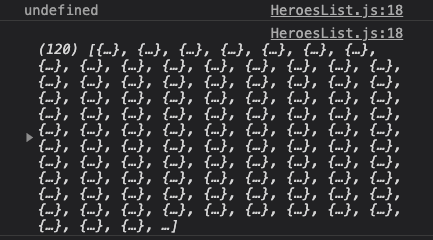
The undefined log shows up because we did not initialize state.heroes inside main.js. Let’s initialize it to an empty array as before.
Tiny({ // ... state: { heroes: [], }, // ...})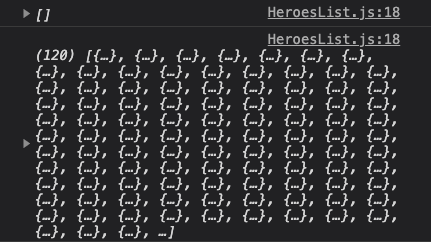
We need to show the list of heroes in HeroesList now. We can show the initial list using this.props.heroes.
export default Tiny({  // ...  template() {    return `      <!-- Header -->
      <main tiny-listener="[filter-heroes, filterHeroes]">        <div class="wrap">          <!-- Site Title -->
          <div class="sidebar-content">            <!-- Filters -->
            <div class="content">              <ul class="heroes-list">                ${this.props.heroes                  .map(hero => {                    // ...                  })                  .join('')}              </ul>            </div>          </div>        </div>      </main>    `  },})
Filtering heroes
To filter heroes, we need to pass props.heroes instead of state.heroes downwards into the Filter component.
export default Tiny({  // ...  template() {    return `      <!-- Header -->
      <main tiny-listener="[filter-heroes, filterHeroes]">        <div class="wrap">          <!-- Site Title -->
          <div class="sidebar-content">            <div class="sidebar flow">              <div tiny-component="Filters" tiny-props="[heroes, props.heroes]"></div>            </div>
            <div class="content">              <!-- Heroes List -->            </div>          </div>        </div>      </main>    `  },})
After filtering, we want to display the filtered heroes. We currently store these inside a state.displayedHeroes.
We know state.displayedHeroes can have one following:
- 0 heroes — before heroes are fetched
- Max heroes — if no filters are checked
- A number between 0 to max heroes — if some filters are checked.
This tell us we can use state.displayedHeroes over props.heroes. But we need to make sure we display all heroes when state.displayedHeroes is 0.
One simple way to do this is create a new variable to store the correct array of heroes we want to display:
export default Tiny({ // ... template() { const heroes = this.state.displayedHeroes.length > 0 ? this.state.displayedHeroes : this.props.heroes // ... },})We can then use this heroes variable to display heroes.
export default Tiny({  // ...  template() {    // ...    return `      <!-- Header -->
      <main tiny-listener="[filter-heroes, filterHeroes]">        <div class="wrap">          <!-- Site Title -->
          <div class="sidebar-content">            <!-- Filters -->
            <div class="content">              <ul class="heroes-list">                ${heroes                  .map(hero => {                    // ...                  })                  .join('')}              </ul>            </div>          </div>        </div>      </main>    `  },})
Phew! That’s a lot of refactoring! At this point, the filters should work properly again.
Passing heroes data into Hero Page
We can pass heroes data into Hero Page with tiny-props. This step should be easy for you:
Tiny({ // ... template() { // ... if (path.includes('/heroes/')) { return '<div tiny-component="HeroPage" tiny-props="[heroes, state.heroes]"></div>' } },})We can finally render the hero’s name and image into the Hero Page!
Rendering the hero’s name and image
To render the hero’s name and image, we need to know which hero page we’re on. We can get this information from the URL.
The URL has the following format:
/heroes/:npcHeroNameWe need the npcHeroName part from the URL. We can pass /heroes/ into split to split this URL into two. The second portion is what we want.
export default Tiny({ template() { const npcName = location.pathname.split('/heroes/')[1] // ... },})Once we have npcName, we can find the hero’s information from this.props.heroes.
Now that we have the hero data, we can finally render the hero’s name and image. We do this by extracting the correct data from this.props.heroes
export default Tiny({ template() { const npcName = location.pathname.split('/heroes/')[1] const hero = this.props.heroes.find(h => h.npcHeroName === npcName) console.log(hero) // ... },})
Once we have hero, we can render the hero’s name and image.
export default Tiny({  template() {    const npcName = location.pathname.split('/heroes/')[1]    const hero = this.props.heroes.find(h => h.npcHeroName === npcName)
    return `      <div class="hero-page">        <!-- Header -->
        <main>          <div class="wrap">            <div class="single-column flow-2">              <div class="clear site-title">                <h1 data-hero-name>${hero.name}</h1>                <img                  class="hero__img"                  data-hero-image                  src="${hero.image}"                />                <!-- Description -->              </div>
              <!-- Abilities -->            </div>          </div>        </main>      </div>    `  },})
If you refresh the browser now you’ll get an error:
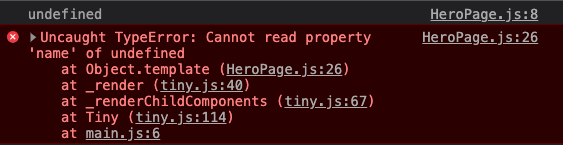
This error happens because hero is undefined. We cannot get a property of an undefined object. The easiest way to circumvent this error is render nothing if ‘hero’ is not found.
export default Tiny({ template() { const npcName = location.pathname.split('/heroes/')[1] const hero = this.props.heroes.find(h => h.npcHeroName === npcName) if (!hero) return '' // ... },})Improving load performance
The Hero Page is empty when we can’t find a hero right now. On a real site, we should still show information (like the logo) even when there is nothing to show.
What we can do is create a function that handles the creation of hero data. This function returns a string that can be used in template. We’ll call it heroHTML
export default Tiny({  heroHTML(hero) {    return `<div class="single-column flow-2">      <div class="clear site-title">        <h1 data-hero-name>${hero.name}</h1>        <img          class="hero__img"          data-hero-image          src="${hero.image}"        />        <p data-hero-description></p>      </div>
      <section hidden>        <h2>Abilities</h2>        <ul class="abilities flow" data-hero-abilities></ul>      </section>    </div>`  },  // ...})
If no heroes are found, we simply return an empty string from heroHTML
export default Tiny({ heroHTML(hero) { if (!hero) return '' // ... }, // ...})We can use heroHTML like this:
export default Tiny({  template() {    // ...    return `      <div class="hero-page">        <!-- Header -->
        <main>          <div class="wrap"> ${this.heroHTML(hero)} </div>        </main>      </div>    `  },})
Further improvements
We don’t use hero in template at this point — only in heroHTML — so it’s okay to create hero inside heroHTML. If we do this, we don’t have to pass the hero variable into heroHTML.
export default Tiny({  heroHTML() {    const npcName = location.pathname.split('/heroes/')[1]    const hero = this.props.heroes.find(h => h.npcHeroName === npcName)    // ...  },
  template() {    return `      <div class="hero-page">        <!-- Header -->
        <main>          <div class="wrap"> ${this.heroHTML()} </div>        </main>      </div>    `  },})
That’s it for this lesson!
Welcome! Unfortunately, you don’t have access to this lesson. To get access, please purchase the course or enroll in Magical Dev School.
Unlock this lesson