The body is also called the payload. It contains the meat of the information you want to send.
Two things to note:
- The
bodyis only used forPOST,PUT, andPATCHrequests. - It is not used for
GETandDELETErequests.
When you send information via the body, you need to make sure you set the correct Content-Type header to go with the information you’re sending.
Three Common Content Types
Most of the time, you will use one of these three types of content:
application/jsonapplication/x-www-form-urlencodedmultipart/form-data
Let’s go through each of them.
application/json
If you set Content-Type to application/json, you’re telling the server that you’re sending JSON data — and they should interpret it as such.
Sending application/json data
The body contain JSON data.
If you need to convert JavaScript to JSON, you can use JSON.stringify:
const data = { message: 'Hello World!' }
fetch('link-to-resource', {  method: 'post'  headers: {    'Content-Type': 'application/json'  }  body: JSON.stringify(data)})
If you use zlFetch, you don’t have to set Content-Type or use JSON.stringify — zlFetch does this for you automatically.
const data = { message: 'Hello World!' }
// Using zlFetchzlFetch('link-to-resource', {  method: 'post'  body: data})
application/x-www-form-urlencoded
x-www-form-urlencoded what gets sent from a <form> element to a server if no JavaScript is involved.
<form method="post" action="/link-to-somewhere"> <input name="first-name" /> <input name="email" /> <button>Send!</button></form>Browsers will extract values from the form and turn them into a url-encoded format. This is a format that can be pasted into a browser’s address bar.
For example:
- [email protected] will become
hello%40gmail.com Zell Liewwill becomeZell+Liew
These values will also be paired with their keys into a key=value format like query parameters. Here’s what the above values may look like:
first-name=Zell+Liew&email=hello%40gmail.comSending application/x-www-form-urlencoded data
If you want to send form-urlencoded data with JavaScript, you need to convert the form data into the form-urlencoded format.
First, you need to convert any key-value pairs into the form-urlencoded format.
You can do this with URLSearchParams
const data = { message: 'Hello World!' }const searchParams = new URLSearchParams(data)const formatted = searchParams.toString()
console.log(formatted)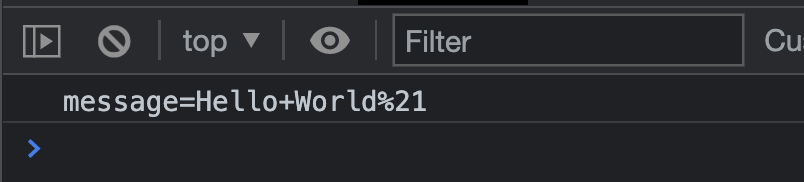
Next, you add the formatted data to the body property.
If you’re using fetch, you can omit Content-Type because fetch sets Content-Type to application/x-www-form-urlencoded by default.
const data = { message: 'Hello World!' }const searchParams = new URLSearchParams(data)const formatted = searchParams.toString()
fetch('link-to-resource', {  method: 'post'  body: formatted})
If you use zlFetch the process becomes simpler.
You can:
importatoQueryStringfunction fromzl-fetch.- Use
toQueryStringto convert JavaScript objects into aform-urlencodedformat. - Set the
form-urlencodeddata asbody.
If you pass a form-urlencoded value as body, zlFetch will help you set the Content-Type to application/x-www-form-urlencoded automatically.
import zlFetch, { toQueryString } from 'zl-fetch'
const data = { message: 'Hello World!' }const formatted = toQueryString(data)
zlFetch('link-to-resource', {  method: 'post'  body: formatted})
Let’s move on to the third Content-Type.
multipart/form-data
multipart/form-data lets you send data that can be split into multiple parts — this is useful for sending files and images.
If you’re building a form that sends multipart/form-data, you need to make sure you add the multipart/form-data encoding.
<form method="post" action="/formdata" method="post" enctype="multipart/form-data"> <input type="text" name="name" /> <input type="file" name="profile_picture"/> <button> Upload </file></form>Sending multipart/form-data with JavaScript
To send multipart/form-data with JavaScript, you need to add your data to an instance of FormData.
Here, you can use the append method.
const formData = new FormData()data.append('message', 'hello-world')Next, you can send the form data directly in both fetch and zlFetch. No need to worry about the Content-Type in both cases — it’s handled for you automatically.
const data = new FormData()data.append('message', 'hello-world')
// Using Fetchfetch('http://link-to-resource', { body: data })
// Using zlFetchzlFetch('http://link-to-resource', { body: data })
Bonus: The easiest way to get data from a form element
The easiest way to get data from the form element is to pass the entire form into FormData.
const form = document.querySelector('form')
form.addEventListener('submit', event => {  event.preventDefault()  const data = new FormData(form)})
If you want to convert this data into a JavaScript Object or the form-urlencoded formats, you can use the helpers that I’ve included in zlFetch.
// Converting FormData to objectimport zlFetch, { toObject } from 'zl-fetch'
form.addEventListener('submit', async event => {  const formData = new FormData(form)  const data = toObject(formData)
  console.log(data)})
// Converting object to form-url-encodedimport zlFetch, { toObject, toQueryString } from 'zl-fetch'
form.addEventListener('submit', async event => { const formData = new FormData(form) const object = toObject(formData) const data = toQueryString(object)
console.log(data)})That’s all you need to know about the request body!
Next, you’re going to learn about Authentication.
This is super important because you need to authenticate to use most real-world APIs.
Let’s go.
Welcome! Unfortunately, you don’t have access to this lesson. To get access, please purchase the course or enroll in Magical Dev School.
Unlock this lesson