Access tokens can expire after a certain amount of time.
Identity providers set expiry dates on access tokens for security reasons — in case the token gets stolen.
These identity providers will always give you a way to request a new access token without asking the user to login again.
- Most providers do this with a refresh token.
- Some providers (like Facebook) use non-standard methods. You’ll learn how to handle these cases when we build a Login App in the next chapter.
Refresh Token Grant
The refresh token grant works like this:
- You get a refresh token from the identity provider.
- You save the refresh token somewhere so you can use it later.
- When the access token expires, you use the refresh token to generate a new access token.
Getting a refresh token
To get a refresh token, you need to send an offline scope to the identity provider. You do this when you generate the sign-in link for the user.
The value of this offline scope differs from provider to provider, so you have to check the documentation to be sure. For example:
- Twitter uses
offline.access - Google uses
offline
Here’s an example where we generate a link with an offline.access scope for Twitter. (We’re also going to add a users.read scope because we’ll need it later).
// Example of a link with an offline.access scopeapp.get('/auth/twitter', (req, res) => {  // ...  const params = {    // ...    scope: 'tweet.read users.read offline.access',  }
  const query = new URLSearchParams(params)  const link = baseURL + '?' + query.toString()  res.redirect(link)})
If the user signs in to Twitter with this link, Twitter will send you a refresh token together with an access token.
// You will obtain the refresh token together with the access tokenapp.get('/auth/twitter/callback', async (req, res) => { // ... const response = await zlFetch.post(/* Get access token */) console.log(response.body)})
Some identity providers (like Google) gives you the refresh token one time only — on the first login.
If you did not save the refresh token, you have to revoke the login to get the refresh token again. We’ll show you how to do in the next chapter.
Saving the refresh token
We want to keep the refresh tokens safe — far away from public clients — because refresh tokens don’t change for most identity providers.
- The best place to keep refresh tokens is in your database.
- The second best place is cookies with the
httpOnlyattribute. - The last place you can keep refresh tokens is in local storage.
Keeping refresh tokens in cookies or local storage is generally a frowned upon practice because you’re exposing the refresh token to unnecessary risk.
Try to keep it in your database as much as you can!
Checking whether the access token is valid
You want to use the refresh token grant when the access token is invalid.
Access tokens can be invalid for two reasons:
- The access token has expired.
- Someone changed the user’s access token value.
The first scenario will happen. The second one is unlikely.
Checking whether the access token has expired
If you saved the token’s expiry value like we mentioned in the previous lessons, you should be able to obtain the expiry value from the place you saved it in.
// If you saved it in cookiesapp.get('/', (req, res) => { const tokenInfo = req.cookies.token const { expiresAt } = token})// If you saved it in localStorageconst tokenInfo = localstore.get('token')const { expiresAt } = tokenInfoYou can compare expiresAt with the Date.now to determine whether the token has expired.
if (Date.now() > expiry) { // Token has expired}Checking whether the access token is valid
You can check whether the access token is valid by sending a request to the API. Normally, we use a request to get the user’s information since it’s the most straightforward one.
For example, Twitter provides you with a me endpoint that gives information about the current user.
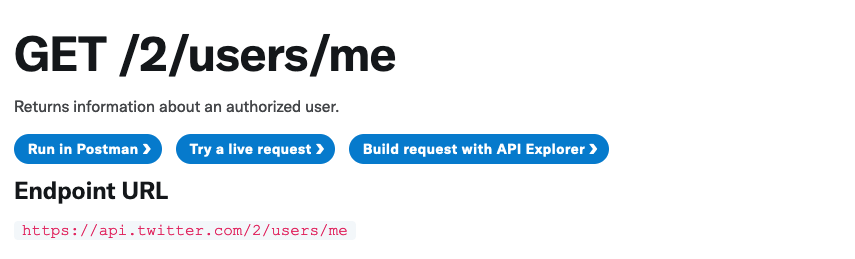
To use this endpoint, the access token needs to have a users.read scope (this is why we added users.read to the scope earlier in this lesson).

We can check whether the access token is valid by sending a request to the endpoint:
function getMe() {  const endpoint = 'https://api.twitter.com/2/users/me'  const response = await zlFetch(endpoint, {    auth: accessToken  })
  return response.body}
getMe('access_token')  .then(console.log)  .catch(console.log)
If the access token is valid, Twitter will send you the following information.

If access token has expired or is invalid, you will get an error instead.

Pay attention to the error message.
When you read the error message, you’ll notice it doesn’t make sense because:
- We’re are using an access token that uses OAuth 2.0 User Context.
- We are not trying to use an access token that uses the OAuth 2.0 Application-only token (which you can obtain from the developer portal)
So the error message is incorrect.
It’s normal to get incorrect error messages from APIs when you’re authenticating with them. This means you can’t trust error messages completely.
You have to develop a sense of what may have gone wrong, and you have to test each hypothesis out until you find the actual error.
Moving on, once you know the access token is invalid, you can use the refresh token to generate a new access token.
Using the refresh token
Here, you send a request to an endpoint to request for an access token.
Most of the time, this endpoint is the same one you used when you exchanged code for the access token. But again, check the documentations to be sure.
Here, you need to send two values — the refresh token and the grant type. You may also need to send your client_id and client_secret depending if the identity provider requires them.
const body = { refresh_token: 'your-refresh-token', grant_type: 'refresh_token', // client_id and client_secret if the identity provider requires it.}For Twitter, you can use these instructions:
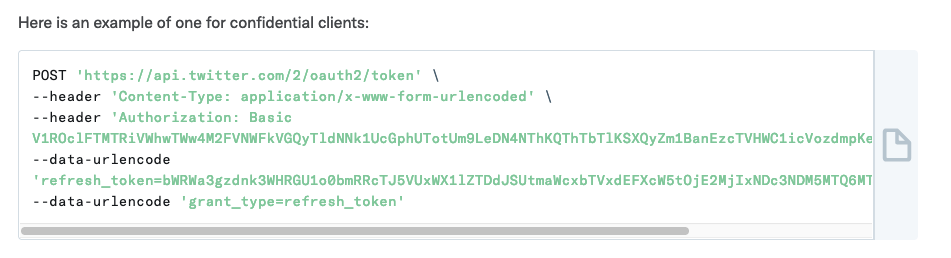
This means: you can use the refresh token grant with the following code:
async function refreshTokenGrant(refreshToken) {  const response = await zlFetch.post(    'https://api.twitter.com/2/oauth2/token',    {      // Use the same auth and headers as when you exchanged code for access token      auth: {        /* ... */      },      headers: {        /* ... */      },      body: {        refresh_token: refreshToken,        grant_type: 'refresh_token',        client_id: TWITTER_CLIENT_ID,      },    },  )
  return response.body}
Identity providers will return a new access token to when the refresh token grant succeeds. This response will be the same one you get when you exchanged code for an access token.

If the identity provider sends you another refresh token (like in Twitter’s case), you have to save this new refresh token — because the old one is not be usable anymore.
Further notes
Some refresh tokens can also expire. Whether it does depends on the identity provider. If the refresh token cannot be used, you need to ask the user to login again.
So here’s how you would implement a refresh token grant:
- Check if access token is expired.
- Check if access token is valid.
- If token is invalid or expired, use the refresh token grant
- If the refresh token is invalid, ask the user to login again with the identity provider
That’s it.
Welcome! Unfortunately, you don’t have access to this lesson. To get access, please purchase the course or enroll in Magical Dev School.
Unlock this lesson