When the user clicks on a button, we need to know which modal to open. We can pass this button and its corresponding modal into Modal.
Modal({ modal: document.querySelector('#user-triggered-modal'), button: document.querySelector('#user-triggered-modal-button'),})We can accept these properties via a settings object.
export default function Modal(settings) { const { button, modal } = settings}Writing openModal
To open the modal, we need to add is-open to the modal’s overlay. We can find the overlay from the modal element. (The overlay is the modal’s parent element).
export default function Modal(settings) { const { button, modal } = settings const overlay = modal.parentElement console.log(overlay)}
We need to create an openModal function inside modal.js. There are several ways to create this function:
- Creating it outside
Modal - Creating it inside
Modal - Creating it as a method
There are pros and cons to each approach.
If we create openModal outside Modal, the code will look something like this:
export default function Modal(settings) {  // ...}
function openModal() {  // ...}
The downside to this approach is you cannot take advantage of the lexical scope. You have to pass in variables from Modal into openModal.
Example:
export default function Modal(settings) {  // ...  openModal(overlay)}
function openModal(overlay) {  overlay.classList.add('is-open')}
If we declare openModal in Modal, we don’t have to pass in any variables. We can rely on the lexical scope.
export default function Modal(settings) {  // ...
  function openModal() {    overlay.classList.add('is-open')  }
  // Opening the modal  openModal()}
Although this works, I find it messy to have lots of functions scattered inside another function. I find it easier to read the code when all my functions are placed together in an object, which brings us to the third way: Creating openModal as a method.
export default function Modal(settings) {  // ...
  const object = {    openModal() {      overlay.classList.add('is-open')    },  }
  // Opening the modal  object.openModal()}
I prefer to use the component’s name as this object since it’s easier to understand. In this case, it’ll be modal.
export default function Modal(settings) {  // ...
  const modal = {    openModal() {      overlay.classList.add('is-open')    },  }
  // Opening the modal  modal.openModal()}
When I do this, I don’t have to write the function as openModal anymore. It’s obvious that I’m opening the modal when I write modal.open. So I can rename openModal to open.
export default function Modal(settings) {  // ...
  const modal = {    open() {      overlay.classList.add('is-open')    },  }
  // Opening the modal  modal.open()}
For this to work, I need to rename the modal variable passed via the settings. I like to add Element as a suffix so I know I’m dealing with an element.
export default function Modal(settings) {  const modalElement = settings.modal  // ...
  const modal = {    /* ... */  }}
We can ask the user to pass in modalElement instead of modal to make this process simpler.
Modal({ modalElement: document.querySelector('#user-triggered-modal'), buttonElement: document.querySelector('#user-triggered-modal-button'),})export default function Modal(settings) { const { modalElement, buttonElement } = settings // ...
const modal = { /* ... */ }}We should also rename overlay to overlayElement to follow the naming convention.
export default function Modal(settings) {  const { modalElement, buttonElement } = settings  const overlayElement = modalElement.parentElement
  const modal = {    /* ... */  }}
We’re done with the setup now. And we can focus on the mechanics of opening the modal.
Opening the Modal
We need to open the modal when a user clicks on the button. This means we need an event listener. We can place this event listener inside Modal to make things simple.
export default function Modal(settings) {  // Declare variables  // Declare methods
  buttonElement.addEventListener('click', _ => {    modal.open()  })}
We can ensure open gets called by checking with a console.log statement.
export default function Modal(settings) {  // Declare variables
  const modal = {    open() {      console.log('Opening modal')    },  }
// Add event listeners buttonElement.addEventListener('click', _ => { modal.open() })}There are six steps to opening the modal:
- Adding an opening class
- Waving the hand
- Focusing on the first element
- Trapping focus
- Setting
aria-expandedtotrue - Preventing screen readers from reading other elements with
aria-hidden.
We can see these six steps clearly from the code we wrote previously.
// Previous codefunction openModal() {  document.body.classList.add('modal-is-open')
  wave()
  const input = modal.querySelector('input')  input.focus()
  document.addEventListener('keydown', trapFocus)
  modalButton.setAttribute('aria-expanded', true)
  main.setAttribute('aria-hidden', 'true')}
Adding the opening class
In the previous lesson, we agreed to use this HTML pattern:
<div class="modal-overlay">  <div class="modal">...</div></div>
<div class="modal-overlay">  <div class="modal">...</div></div>
This means we need to add is-open to the overlay to open the modal.
export default function Modal(settings) {  // Declare variables
  const modal = {    open() {      overlayElement.classList.add('is-open')    },  }
  // Add event listeners}
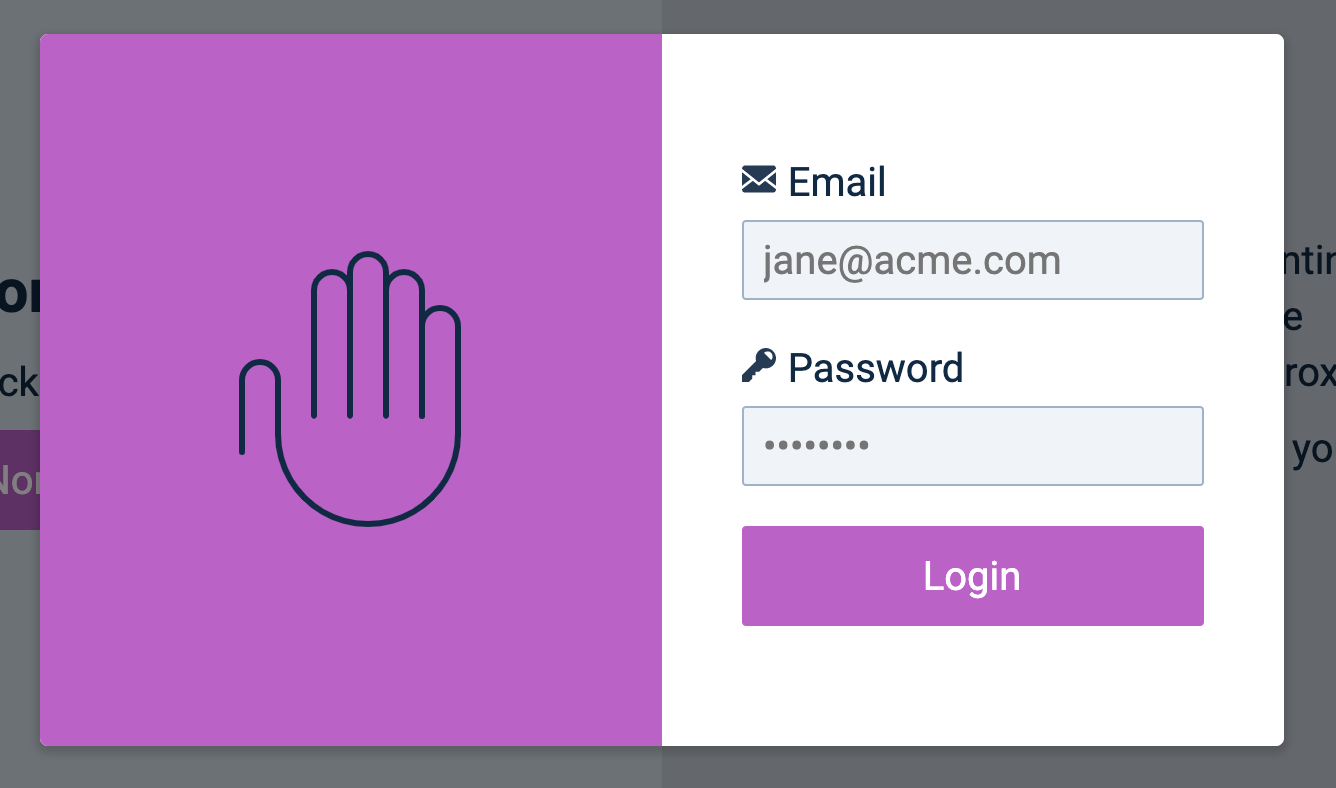
The modal should appear when you click the button.
Waving the hand
We called a wave function inside openModal previously. This wave function makes the hand wave.
// Previous version of openModalfunction openModal() { wave() // ...}When we build libraries, we need to be careful about what we put into the library. In this case, it doesn’t make sense to write wave inside modal.js because most modals don’t have a waving hand animation.
We can provide a callback for users to inject wave into the Modal library. Since the wave animation runs after the modal opens, we call this callback afterOpen.
Users can pass in the wave animation like this:
Modal({ // ... afterOpen: wave,})We’ll run the wave animation like this:
export default function Modal(settings) {  // Declare variables
  const modal = {    open() {      overlayElement.classList.add('is-open')      settings.afterOpen()    },  }
// Add event listeners}We’ll get an error if the user doesn’t pass in an afterOpen setting. There are two ways to handle this:
- Check with a condition
- Use a fallback function
Option 1 (Check with a condition) looks like this:
export default function Modal(settings) {  // Declare variables
  const modal = {    open() {      overlayElement.classList.add('is-open')      if (settings.afterOpen) {        settings.afterOpen()      }    },  }
  // Add event listeners}
Option 2 is neater. We can provide an empty function as the fallback to run.
It’s often easier to do this with a default settings object. When we create the component, we need to overwrite this default setting object with the options the user passed in.
// Default settings objectconst defaults = {  buttonElement: '',  modalElement: '',  afterOpen() {}, // Empty function used as a fallback}
export default function Modal(settings) {  // Overwrite default settings with user settings  settings = Object.assign({}, defaults, settings)
  // ...}
We can now write afterOpen without checking for conditions.
export default function Modal(settings) {  // Overwrite settings  // Declare variables
  const modal = {    open() {      overlayElement.classList.add('is-open')      settings.afterOpen()    },  }
  // Add event listeners}
Importing GSAP
The wave function depends on GSAP. We included GSAP with a <script> tag previously:
<script src="https://cdnjs.cloudflare.com/ajax/libs/gsap/1.20.3/TweenMax.min.js"></script>Since we converted into ES6 modules, we can include GSAP directly inside main.js. There’s no need to use an extra script tag. This makes it clear what libraries we included in our projects.
import 'https://cdnjs.cloudflare.com/ajax/libs/gsap/1.20.3/TweenMax.min.js'Focusing on the first element
When the modal opens, we choose to focus on the first element. Here’s the code we wrote previously:
function openModal() { const input = modal.querySelector('input') input.focus() // ...}Since we don’t know what users will put into their modals, we cannot ensure the first element is always input. We need to check for other keyboard focusable elements as well.
The easiest way is to use a function I explained in this article.
function getKeyboardFocusableElements(element = document) { return [ ...element.querySelectorAll( 'a, button, input, textarea, select, details, [tabindex]', ), ] .filter(el => !el.hasAttribute('disabled')) .filter( el => !el.hasAttribute('tabindex') || el.getAttribute('tabindex') >= 0, )}We can get all keyboard focusable elements by passing .modal__content into getKeyboardFocusableElements.
export default function Modal(settings) {  // Overwrite settings  // Declare variables  const contentElement = modalElement.querySelector('.modal__content')
  const modal = {    open() {      overlayElement.classList.add('is-open')      settings.afterOpen()
      const focusableEls = getKeyboardFocusableElements(contentElement)    },  }
  // Add event listeners}
We then focus on the first focusable element (if there are any).
export default function Modal(settings) {  // Overwrite settings  // Declare variables  const contentElement = modalElement.querySelector('.modal__content')
  const modal = {    open() {      overlayElement.classList.add('is-open')      settings.afterOpen()
      const focusableEls = getKeyboardFocusableElements(contentElement)      if (focusableEls[0]) focusableEls[0].focus()    },  }
// Add event listeners}Trapping focus
Next, we want to trap focus inside the modal. Here’s what we wrote previously:
function openModal() { document.addEventListener('keydown', trapFocus) // ...}trapFocus looks like this right now:
function trapFocus(event) {  const focusables = modal.querySelectorAll('input, button')  const firstFocusable = focusables[0]  const lastFocusable = focusables[focusables.length - 1]
  // Directs to first focusable  if (    document.activeElement === lastFocusable &&    event.key === 'Tab' &&    !event.shiftKey  ) {    event.preventDefault()    firstFocusable.focus()  }
  // Directs to last focusable  if (    document.activeElement === firstFocusable &&    event.key === 'Tab' &&    event.shiftKey  ) {    event.preventDefault()    lastFocusable.focus()  }}
We know we check for all possible keyboard focusable elements, not just buttons and input fields. So we need to use getKeyboardFocusableElements in trapFocus.
This time, we’re going to pass the modal into getKeyboardFocusableElements because we want to include the close button (which is contentElement’s sibling).
function trapFocus(event) {  const focusables = getKeyboardFocusableElements(modalElement)  const firstFocusable = focusables[0]  const lastFocusable = focusables[focusables.length - 1]
  // ...}
Here’s the question: How do you get modalElement into trapFocus?
There are two methods:
- Declare
trapFocusinsideModal - Use
bindto addmodaltotrapFocus
The first method is easier. We can declare trapFocus inside Modal. If we do this, trapFocus has access to all variables declared in the lexical scope.
// Method 1export default function Modal(settings) {  // Overwrite settings  // Declare variables
  function trapFocus(event) {    // ...  }
  const modal = {    open() {      // ...      document.addEventListener('keydown', trapFocus)    },  }
  // Add event listeners}
The second method is more advanced. We declare trapFocus outside Modal. Then, we create a new function inside Modal with bind.
// Method 2export default function Modal(settings) {  // ...
  // Step 2: Pass `modal` into `trapFocus` with `bind`.  const trapFocusInModal = trapFocus.bind(null, modalElement)
  const modal = {    open() {      // ...      // Step 3: Use `trapFocusInModal`      document.addEventListener('keydown', trapFocusInModal)    },  }
  // ...}
// Step 1: Create a trapFocus function.function trapFocus(element, event) {  const focusables = getKeyboardFocusableElements(element)  // ...}
Which method is better? It depends on your circumstances.
Method 1 is simpler. We simply create a trapFocus method meant for each instance.
Method 2 is more customizable because it lets you change the element you want to trap focus in. It works better if your trapFocus is a library.
We’ll go with method 1 here since it’s easier to grasp.
Setting aria-expanded to true
Next, we want to set the button’s aria-expanded property to true when the modal is open.
Here’s the code we wrote previously.
function openModal() { modalButton.setAttribute('aria-expanded', true)}In Modal, we declared the button as buttonElement. This step is as simple as copying the code (with adjustments) into open.
export default function Modal(settings) {  // Overwrite settings  // Declare variables
  const modal = {    open() {      // ...      buttonElement.setAttribute('aria-expanded', true)    },  }
  // Add event listeners}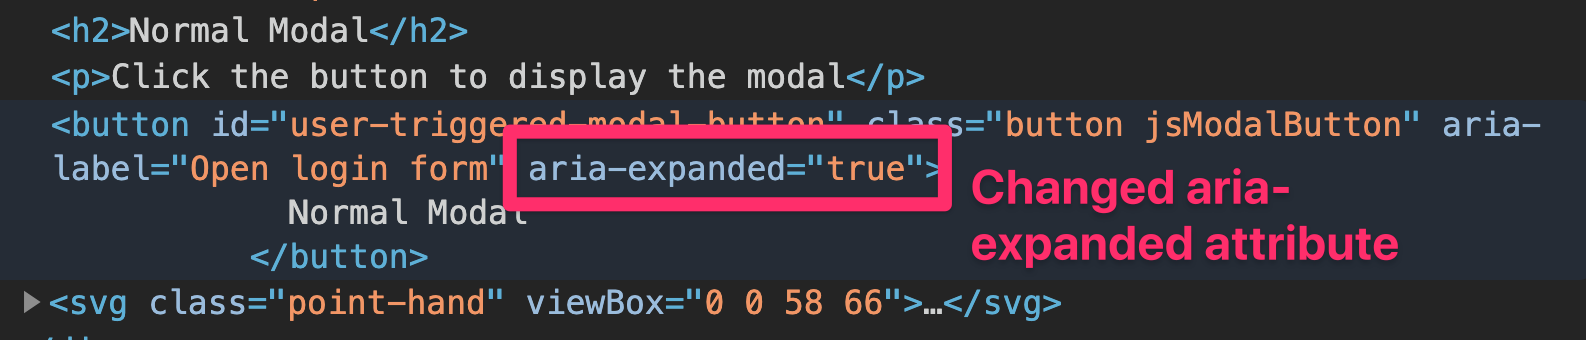
Preventing screen readers from reading sibling elements
When the modal is open, we want to prevent screen readers from reading other elements. We do this by setting aria-hidden on all sibling elements.
In the previous version, the only sibling element is main. So our code is easy:
function openModal() { main.setAttribute('aria-hidden', true)}This time, we cannot be sure that main is the only other sibling element. We need to add aria-hidden to all possible sibling elements.
The easiest way is to find all sibling elements, loop through them, and add aria-hidden to them.
export default function Modal(settings) {  // Overwrite settings  // Declare variables
  const modal = {    open() {      // ...      const overlaySiblingEls = [        ...overlayElement.parentElement.children,      ].filter(el => el !== overlayElement)
      overlaySiblingEls.forEach(element => {        element.setAttribute('aria-hidden', true)      })    },  }
  // Add event listeners}
Root elements in the DOM should have an aria-hidden attribute after you open the modal.

That’s it! We’ll work on closing the modal next.
Welcome! Unfortunately, you don’t have access to this lesson. To get access, please purchase the course or enroll in Magical Dev School.
Unlock this lesson