When we create a task, we want to:
- Save that task to the database
- Update the DOM with the task
This creates an interesting set of challenges (as you’ll see).
Saving the task to the Database
To save a task to the database, we need to send a POST request to the /tasks endpoint.
zlFetch.post(`${rootendpoint}/tasks`, { auth, body: { // Information about the task },})We want to save a task to the database when we create a task. This means the POST request should be written in the task-creation event listener.
// Creates and saves a tasktodolist.addEventListener('submit', event => { // ... Send POST request here})The API lets us send two properties:
name: Name of the task.nameis requireddone: Whether the task is completed
name is required. This means the POST request should come after inputValue.
todolist.addEventListener('submit', event => {  event.preventDefault()
  const newTaskField = todolist.querySelector('input')  const inputValue = newTaskField.value.trim()
  zlFetch.post(`${rootendpoint}/tasks`, {    auth,    body: {      name: inputValue,    },  })})
This sends the task to the server.
Whenever you send a user-entered-value to the server, you want to sanitize that value. This prevents XSS attacks.
todolist.addEventListener('submit', event => { // ... zlFetch.post(`${rootendpoint}/tasks`, { auth, body: { name: DOMPurify.sanitize(inputValue), }, })})Alternatively, you can sanitize the input immediately after retrieving it:
todolist.addEventListener('submit', event => {  event.preventDefault()
  const newTaskField = todolist.querySelector('input')  const inputValue = DOMPurify.sanitize(newTaskField.value.trim())  // ...})
Next, we want to make sure the task is saved to the database before we add it to the DOM. This means we have to wait for a response from the API.
todolist.addEventListener('submit', event => { // ... zlFetch(/* ... */).then(response => { console.log(response.body) // Append task to DOM })})If the response is successful (which means the task is saved successfully), you should get an object with id, name, and done properties.

We can use the id, name and done to create a task element with makeTaskElement. Then, we add the task element to the DOM.
todolist.addEventListener('submit', event => { // ... zlFetch(/* ... */).then(response => { const task = response.body const taskElement = makeTaskElement(task) taskList.appendChild(taskElement) })})After the task gets added to the DOM, we want to clear the new task field and bring the focus back to the field.
todolist.addEventListener('submit', event => {  // ...  zlFetch(/* ... */).then(response => {    // Append task to DOM...
    // Clear the new task field    newTaskField.value = ''
    // Bring focus back to input field    newTaskField.focus()  })})
We also want to prevent users from adding an empty task.
todolist.addEventListener('submit', event => {  event.preventDefault()
  // Get value of task  const newTaskField = todolist.querySelector('input')  const inputValue = newTaskField.value.trim()
  // Prevent adding of empty task  if (!inputValue) return
  // Sends POST request...})
Here’s what you’ll see.
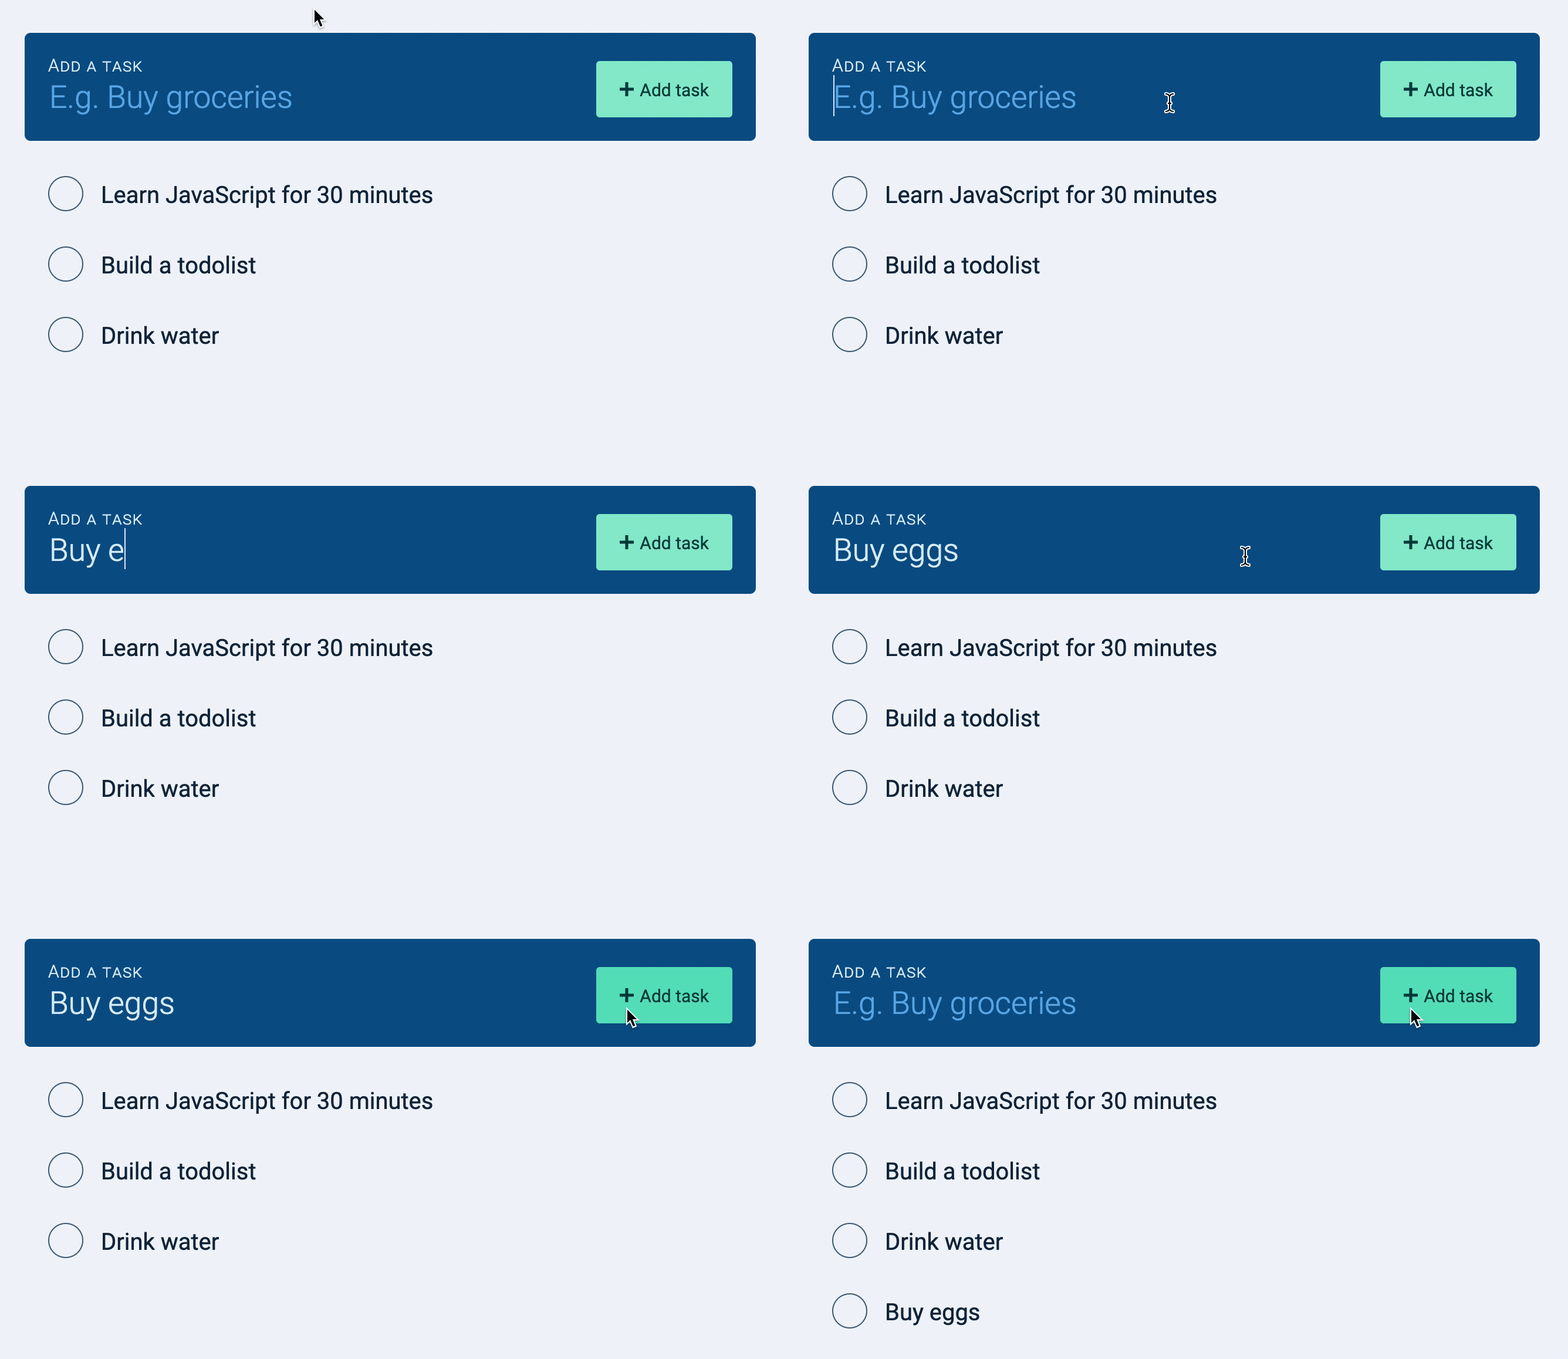
This is pretty good, but did you notice a delay in adding the task? This delay introduces a huge problem.
Problem with the delay
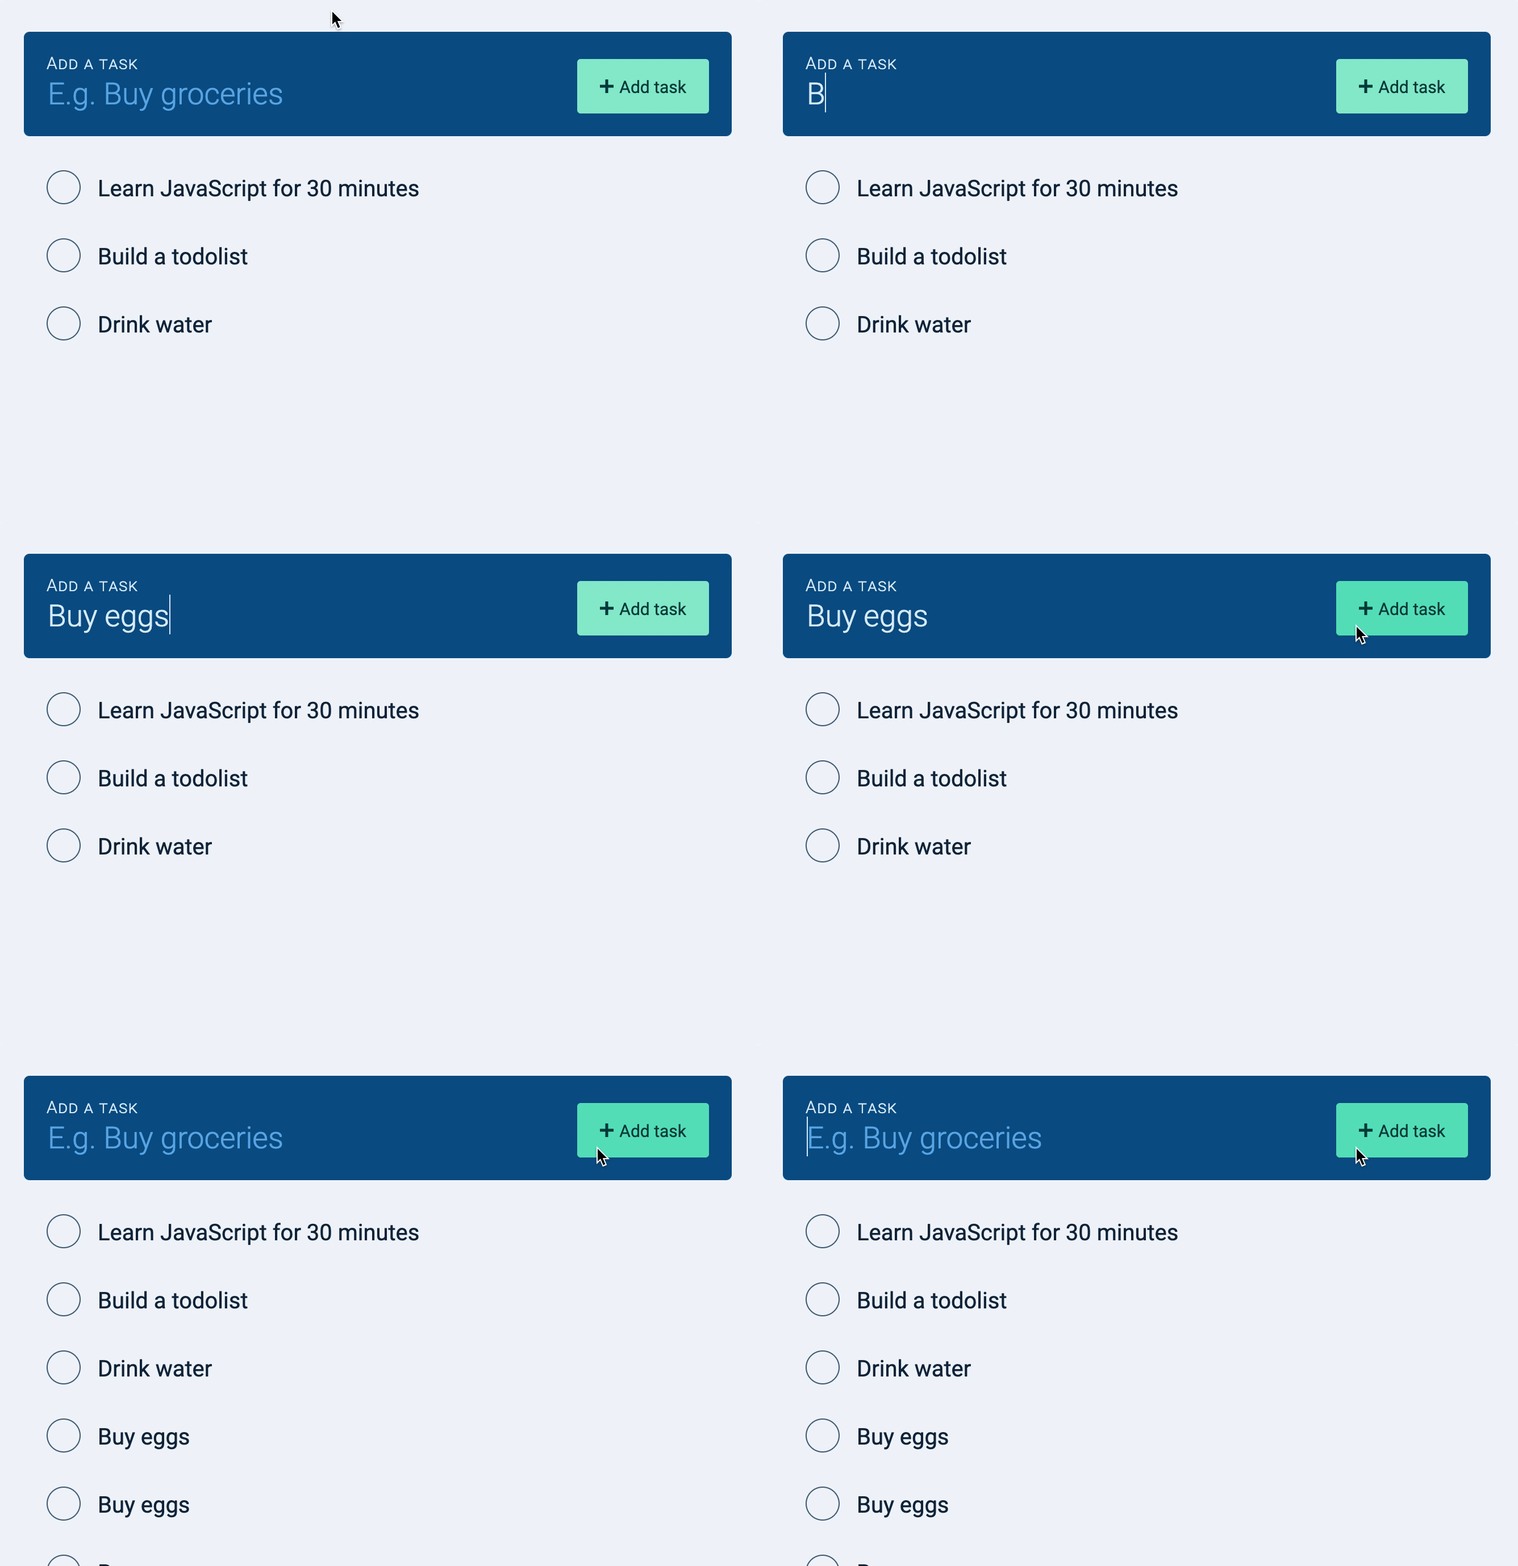
Users experience nothing after submitting the form. They may think the website hanged. When they think the website hanged, they may try to click a few more times.
If they click a few more times, we create duplicated tasks:
Fixing the delay
We can do two things to fix this problem:
- Telling users we’re adding a task
- Preventing users from creating tasks as we wait for a response from the server
Telling users we’re adding a task
First, we want to let users know we’re adding a task. This is traditionally done with a spinner. But you don’t need a spinner to do this.
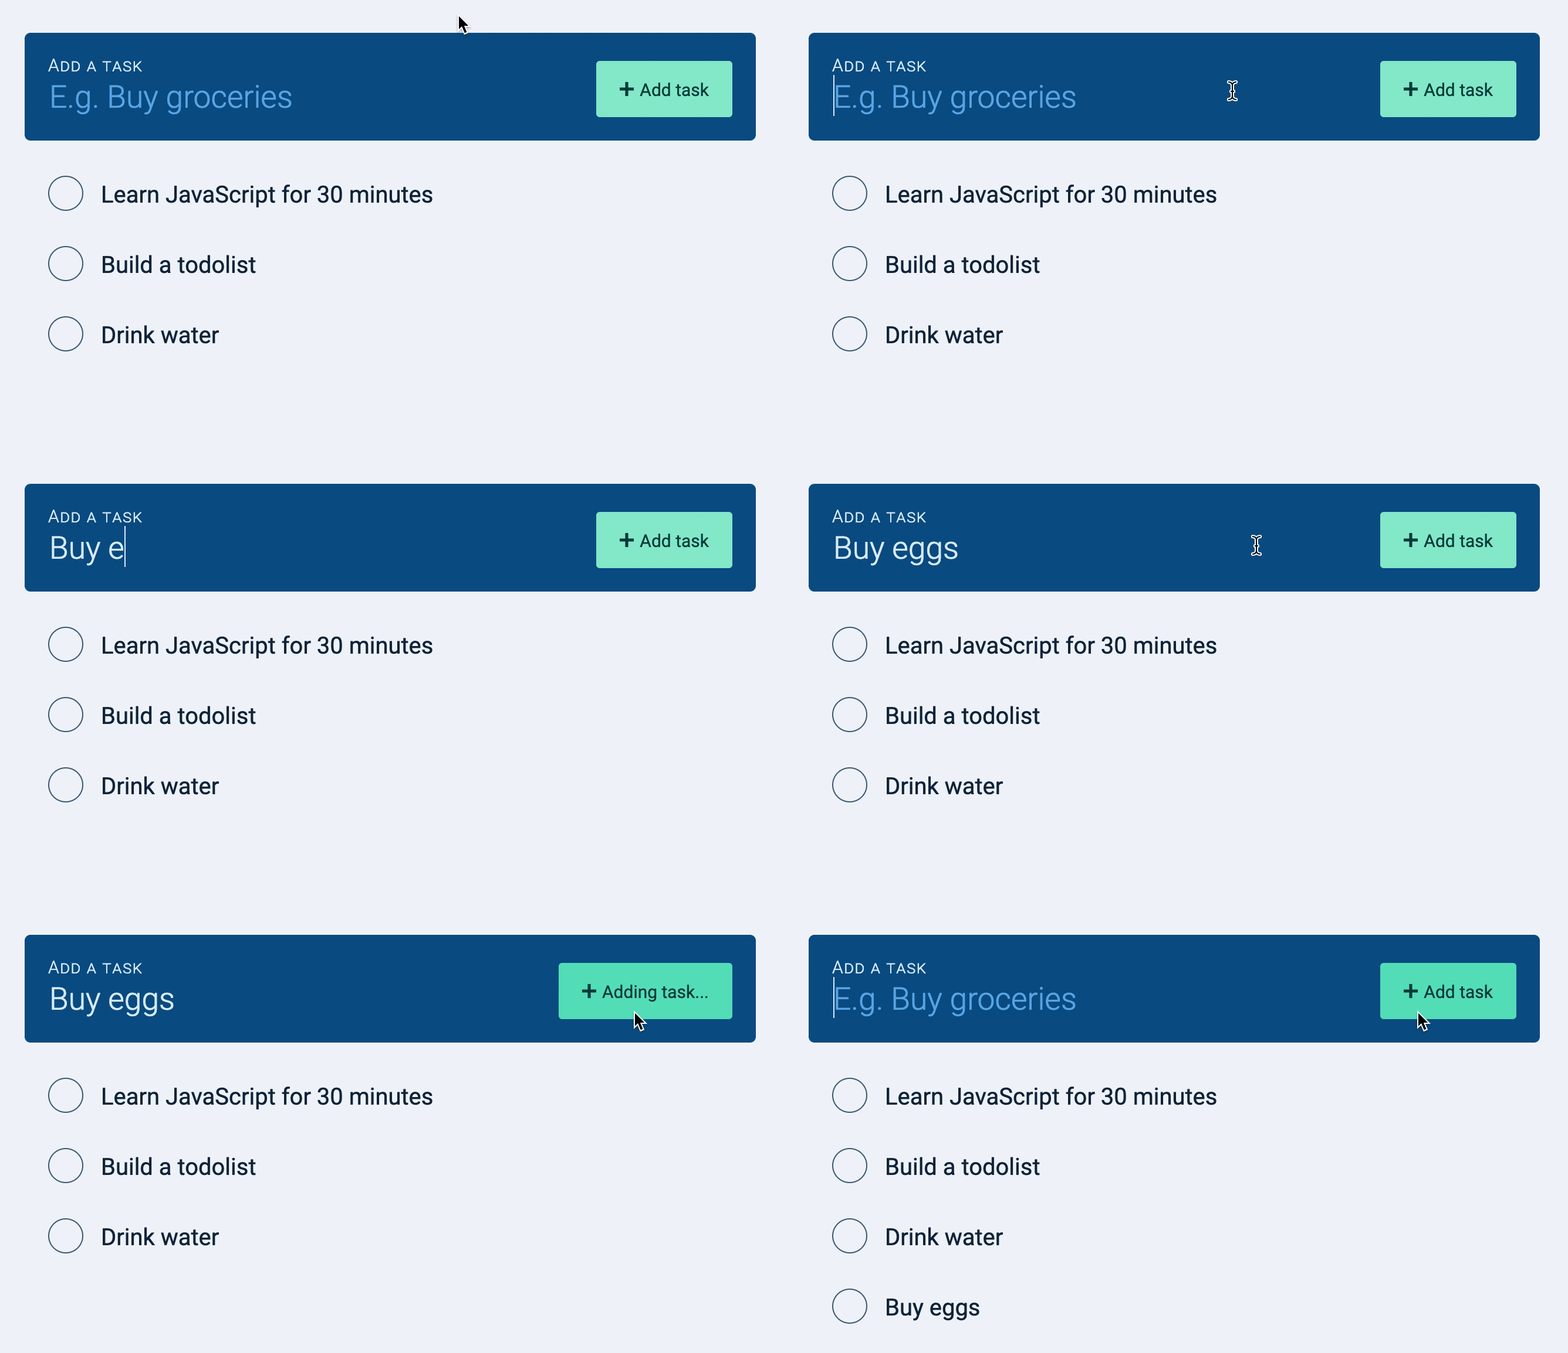
A simple way is to change the words “Add task” to “Adding task” when we send the POST request.
Then, we change “Adding task” back to “Add task” when we get a response from the API.
todolist.addEventListener('submit', event => {  // ...
  // Give indication that we're adding a task  const buttonTextElement = newTaskButton.querySelector('span')  buttonTextElement.textContent = 'Adding task...'
  // Sends POST request  zlFetch(/* ... */)    .then(response => {      /* ... */    })    .catch(error => console.error(error))    .finally(_ => {      // Change button text back to original text      buttonTextElement.textContent = 'Add task'    })})
Note: If browser support isn’t good, you can substitute finally with then.
Preventing users from entering duplicated tasks
We can disable the submit button to prevent users from adding tasks. A form with a disabled submit button doesn’t trigger a submit event. This is how we prevent users from adding duplicated tasks.
We can disable the submit button by adding a disabled attribute.
todolist.addEventListener('submit', event => {  // ...
  // Disable button  const newTaskButton = todolist.querySelector('button')  newTaskButton.setAttribute('disabled', true)
  // Give indication that we're adding a task  const buttonTextElement = button.querySelector('span')  buttonTextElement.textContent = 'Adding task...'
  // ...})
When the task is added, we enable the button again.
todolist.addEventListener('submit', event => {  // ...
  // Sends POST request  zlFetch(/* ... */)    .then(response => {      /* ... */    })    .catch(error => console.error(error))    .finally(_ => {      // Enables button      newTaskButton.removeAttribute('disabled')      // Change button text back to original text      buttonTextElement.textContent = 'Add task'    })})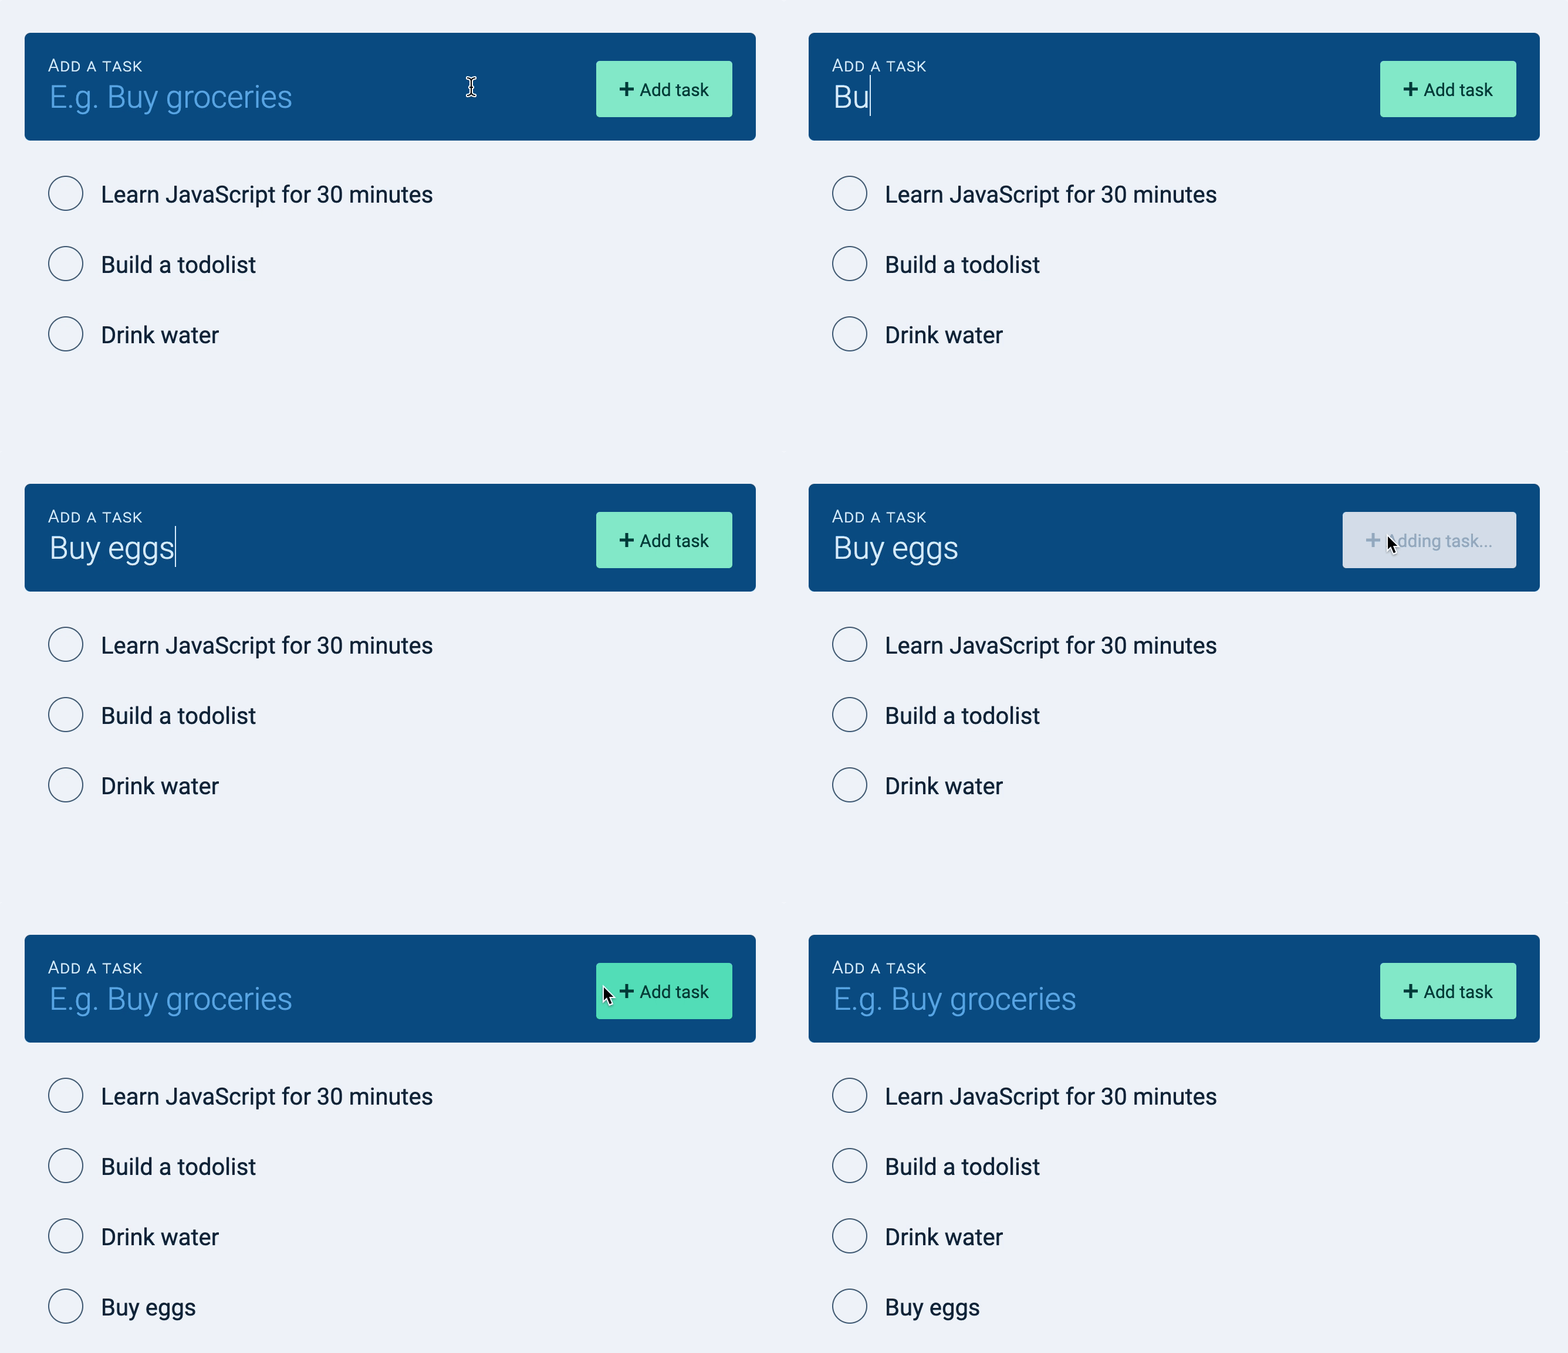
There’s one more thing we can do. (And it’s something more advanced).
Removing the delay
We can’t speed up the round-trip from the browser to the database and back (browser -> server -> database -> server -> browser). That’s a limitation we have to accept. But we can give users the illusion that tasks are saved immediately.
We do this by:
- Adding the task to the DOM immediately
- If the server responds with an error, we remove the task from the DOM
This approach is also known as “Optimistic UI”. This is an advanced concept. We’ll come back and build an optimistic UI after learning to edit and delete tasks.
Welcome! Unfortunately, you don’t have access to this lesson. To get access, please purchase the course or enroll in Magical Dev School.
Unlock this lesson