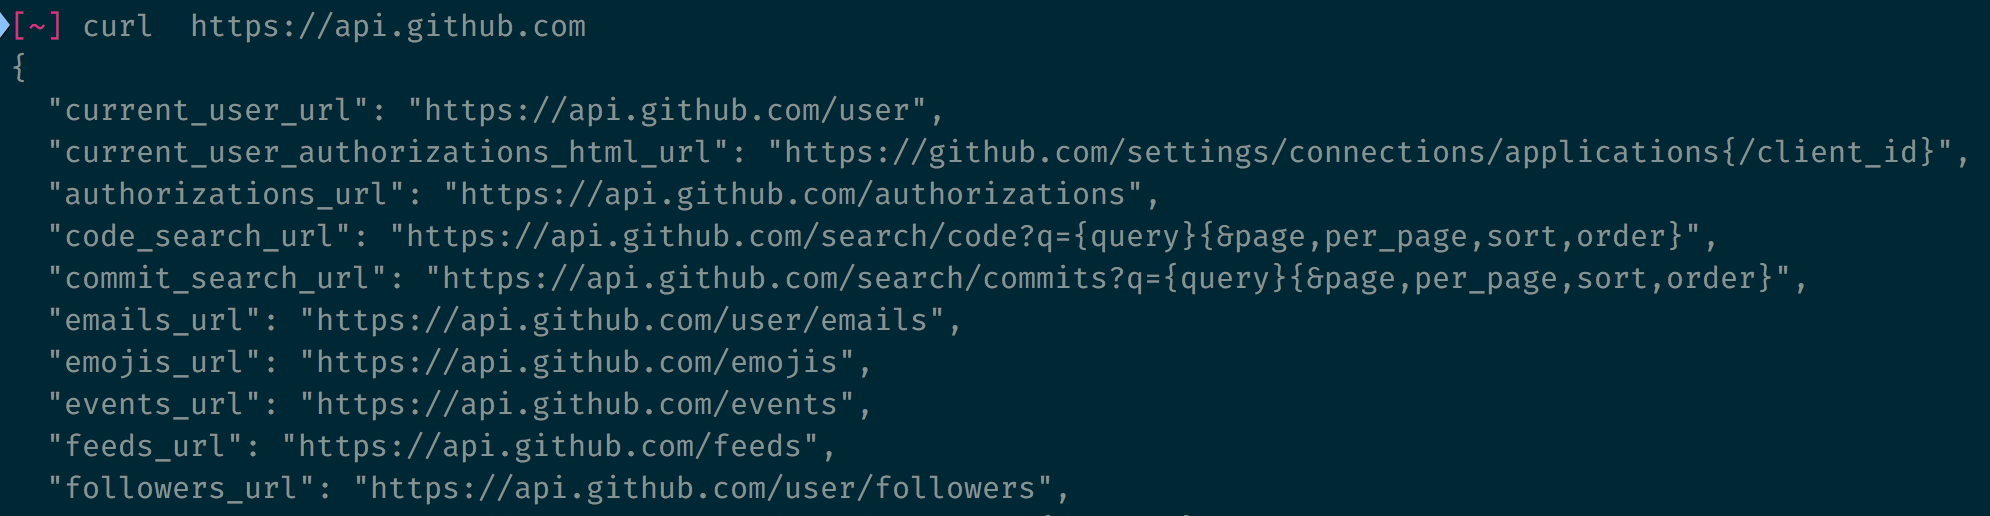
When you read API documentation, you may see requests made by a tool called curl. Here’s an example from Github:

Many APIs explain their documentation through curl. You’ll be able to understand every API documentation if you know curl.
What is curl
Curl is command line program that lets you send requests.
You can access the command line with the “Terminal” app if you use a Mac. If you use Windows, you can use Command Prompt.
The command line looks scary, but there’s nothing to be afraid of. Here’s an article I wrote that can help you out if you’re scared.
Installing curl
Type curl --version into your command line.
curl --versionIf you see a version number, it means you have curl installed. You can move on to the next section.
If you see a “command not found” error, you will need to install curl first.
Sending requests
To send a GET request with curl, you type curl, followed by the endpoint.
curl https://api.github.comIf the server sends you a response, you will see the body of the response in your command line.
Query parameters
If you want to add query parameters to your request, you need to prepend question marks and equal signs with \. Most command line applications will prepend \ for you automatically. This is because ? and = are special characters in the command line.
curl https://api.github.com/users/zellwk/repos\?per_page\=1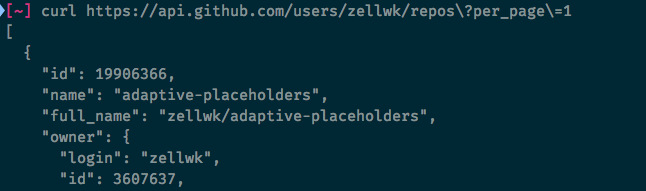
Sending POST requests
To send POST, PUT, PATCH, or DELETE requests, you use a -X flag. Make sure the X in -X is a capital letter. The flags are case sensitive.
curl -X POST https://api.github.com/user/repos
The flag order doesn’t matter. You can put it before or after the url.
curl https://api.github.com/user/repos -X POSTAuthentication
You can perform basic authentication with the -u flag.
curl -X POST -u username:password https://api.github.com/user/repos
Notice the error message changed from “requires authentication” to “problems parsing JSON”. This tells us the authentication is successful.
If you want to authenticate yourself through a token, you need to set an authorization header.
Setting request headers
You can set request headers with -H.
curl -H "Authorization: Bearer token_12345" https://api.github.comTo set a second request header, you use another -H.
curl -H "header1: value1" -H "header2: value2" https://api.github.comTo see your own request headers, you can use -v. Your request headers will be prefixed with >.
curl -v -H "Authorization: Bearer token_12345" https://api.github.com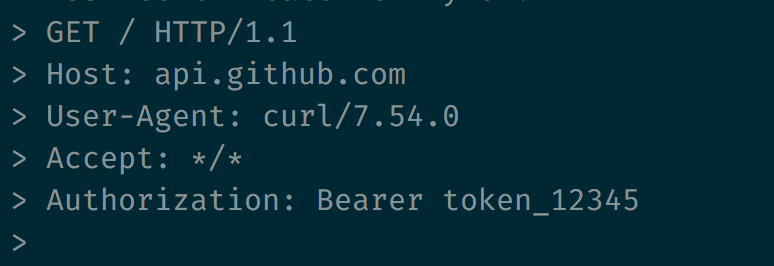
> Viewing response headers
You can also use -v to see response headers. Response headers will be prefixed with <.
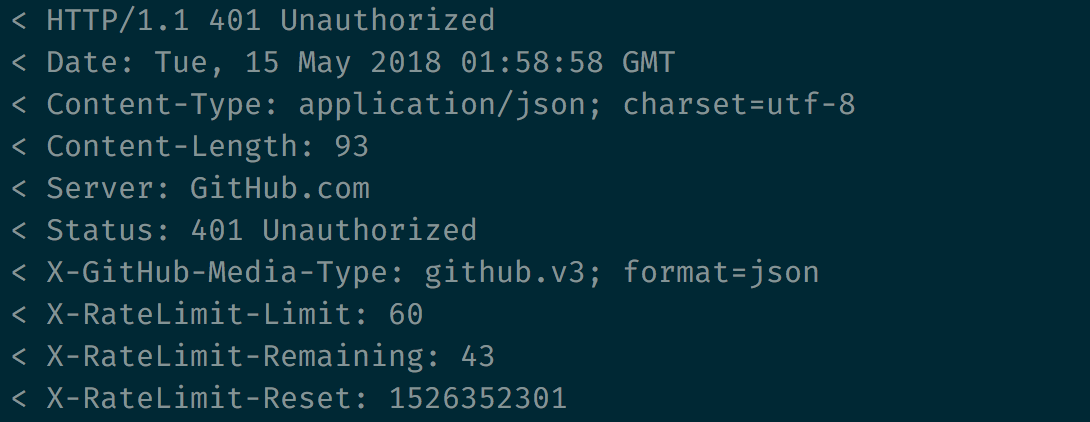
< If you want to view the response headers only, you can use -I.
curl -I -H "Authorization: Bearer token_12345" https://api.github.com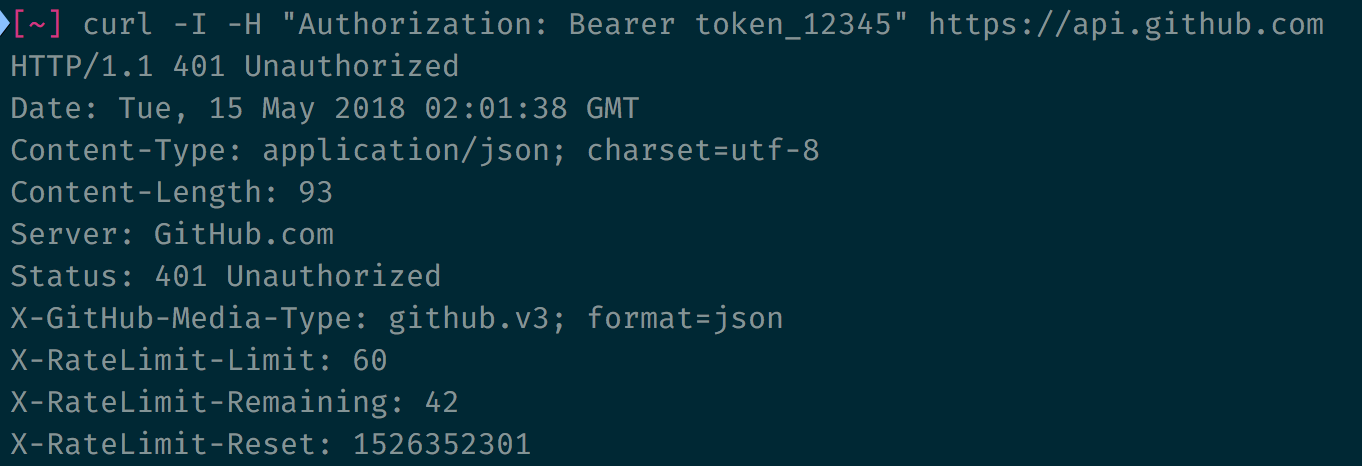
Sending body
To send body data, you use -d. Curl will send your data as x-www-form-urlencoded.
curl -X POST https://jsonplaceholder.typicode.com/posts -d title='Article title' -d body='shameless plug'
-d If you need to encode a value, use --data-urlencode
curl -X POST https://jsonplaceholder.typicode.com/posts -d title='Article title' -d body='shameless plug' --data-urlencode link=https://google.com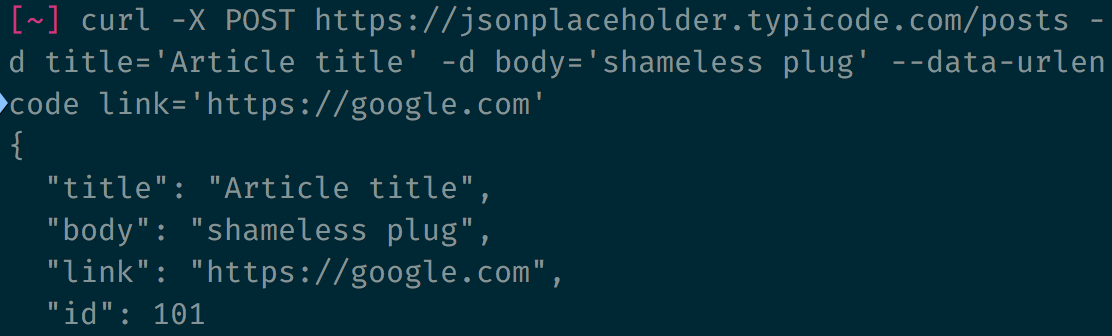
--data-urlencode to encode urls Line breaks
If it makes sense, you can break lines up with \. Make sure there are no spaces after each \.
curl -X POST https://jsonplaceholder.typicode.com/posts \-d title='Article title' \-d body='shameless plug' \--data-urlencode link=https://google.com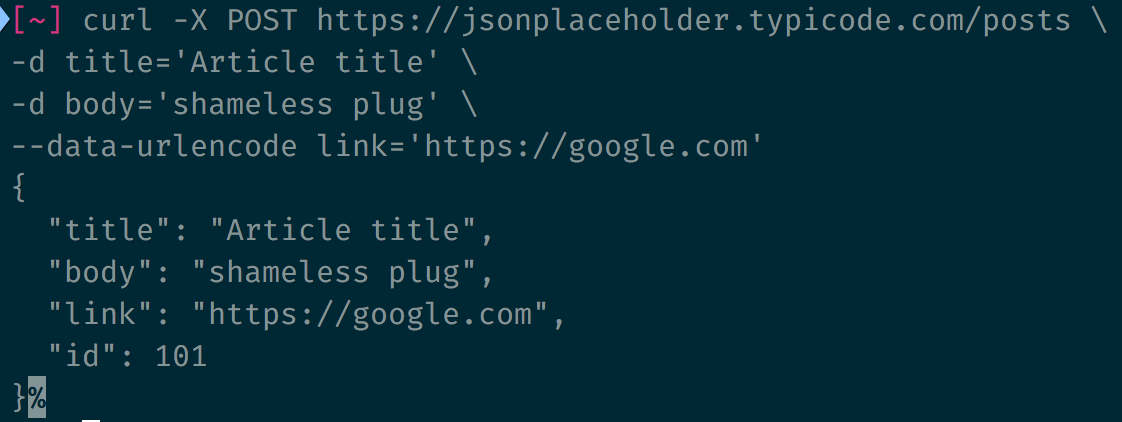
A cheat sheet
Here’s a table to make the commands easier to look up.
| Flag | Purpose |
|---|---|
| -d | Sends data |
| -H | Set request headers |
| -I | View response headers |
| -v | Verbose mode (view request headers, response headers, and body) |
| -u | Basic authentication |
| -X | Sets method |
More curl flags
The flags I taught you above should be enough for most use cases. If you want to find out more about curl, you can read its documentation.
Exercise
- Send a GET request with curl
- Do basic authentication with curl
- Do token based authentication with curl
- Send a POST request with curl
Welcome! Unfortunately, you don’t have access to this lesson. To get access, please purchase the course or enroll in Magical Dev School.
Unlock this lesson