The general box model is a layered model consisting of a content box and optional surrounding margin, border and padding areas. This model can be visualised with the following diagram:
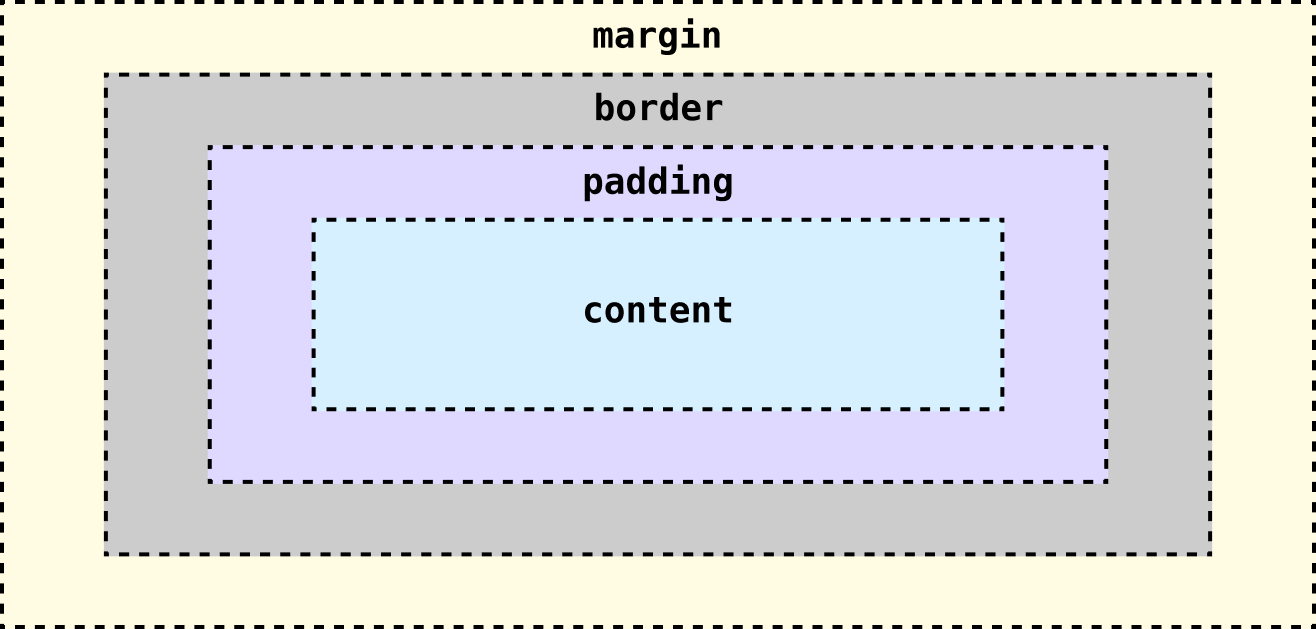
Every browser’s Devtools provides such a visualisation for every element it renders on the page, give it a try on your own preferred browser with the example code.
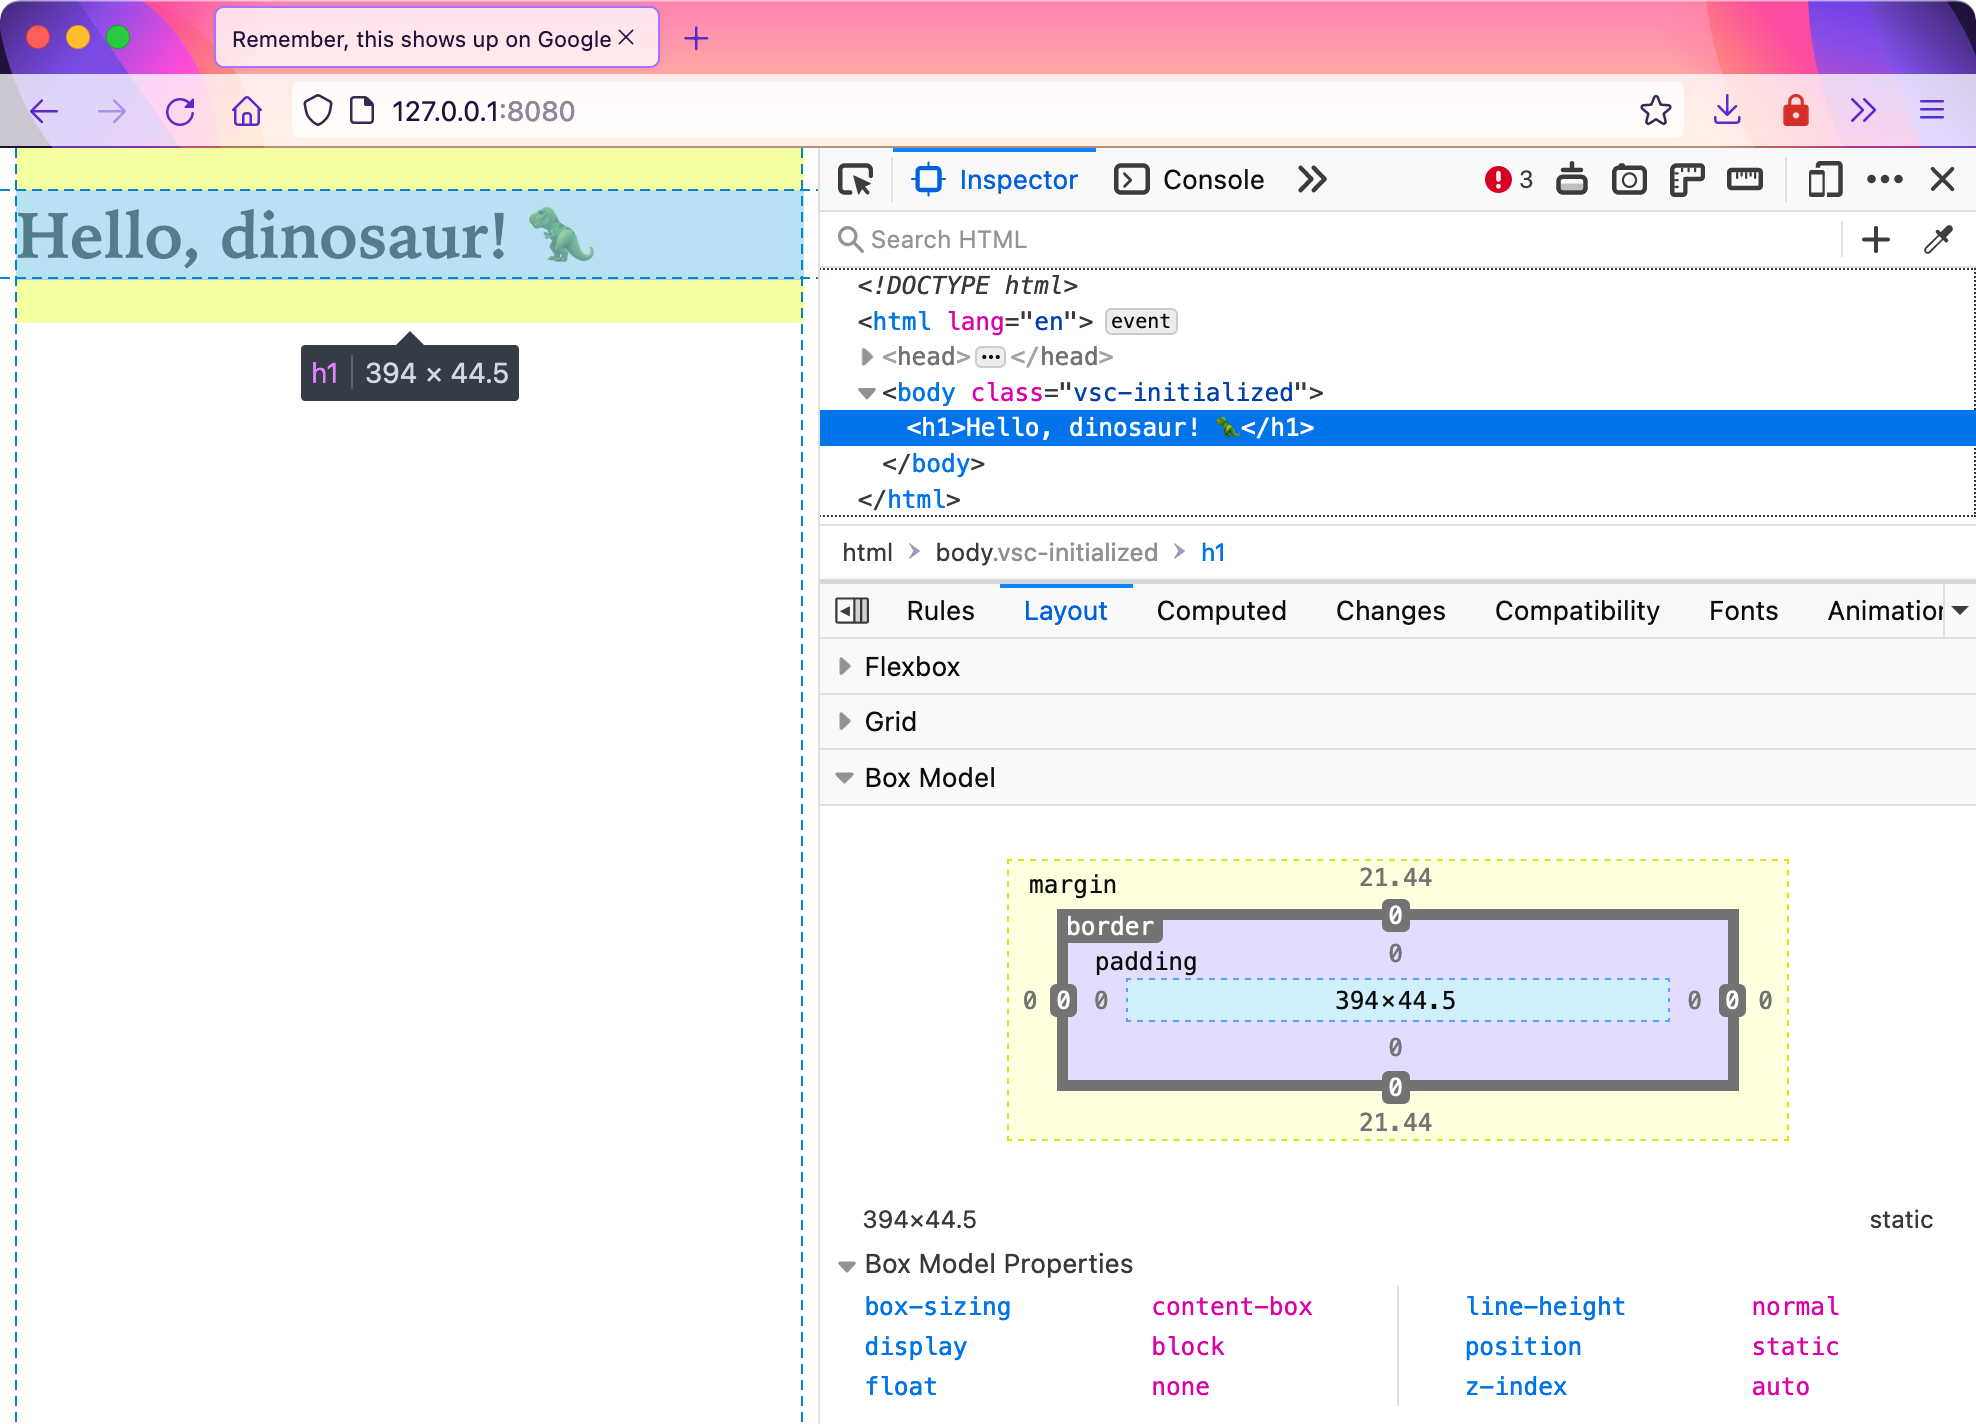
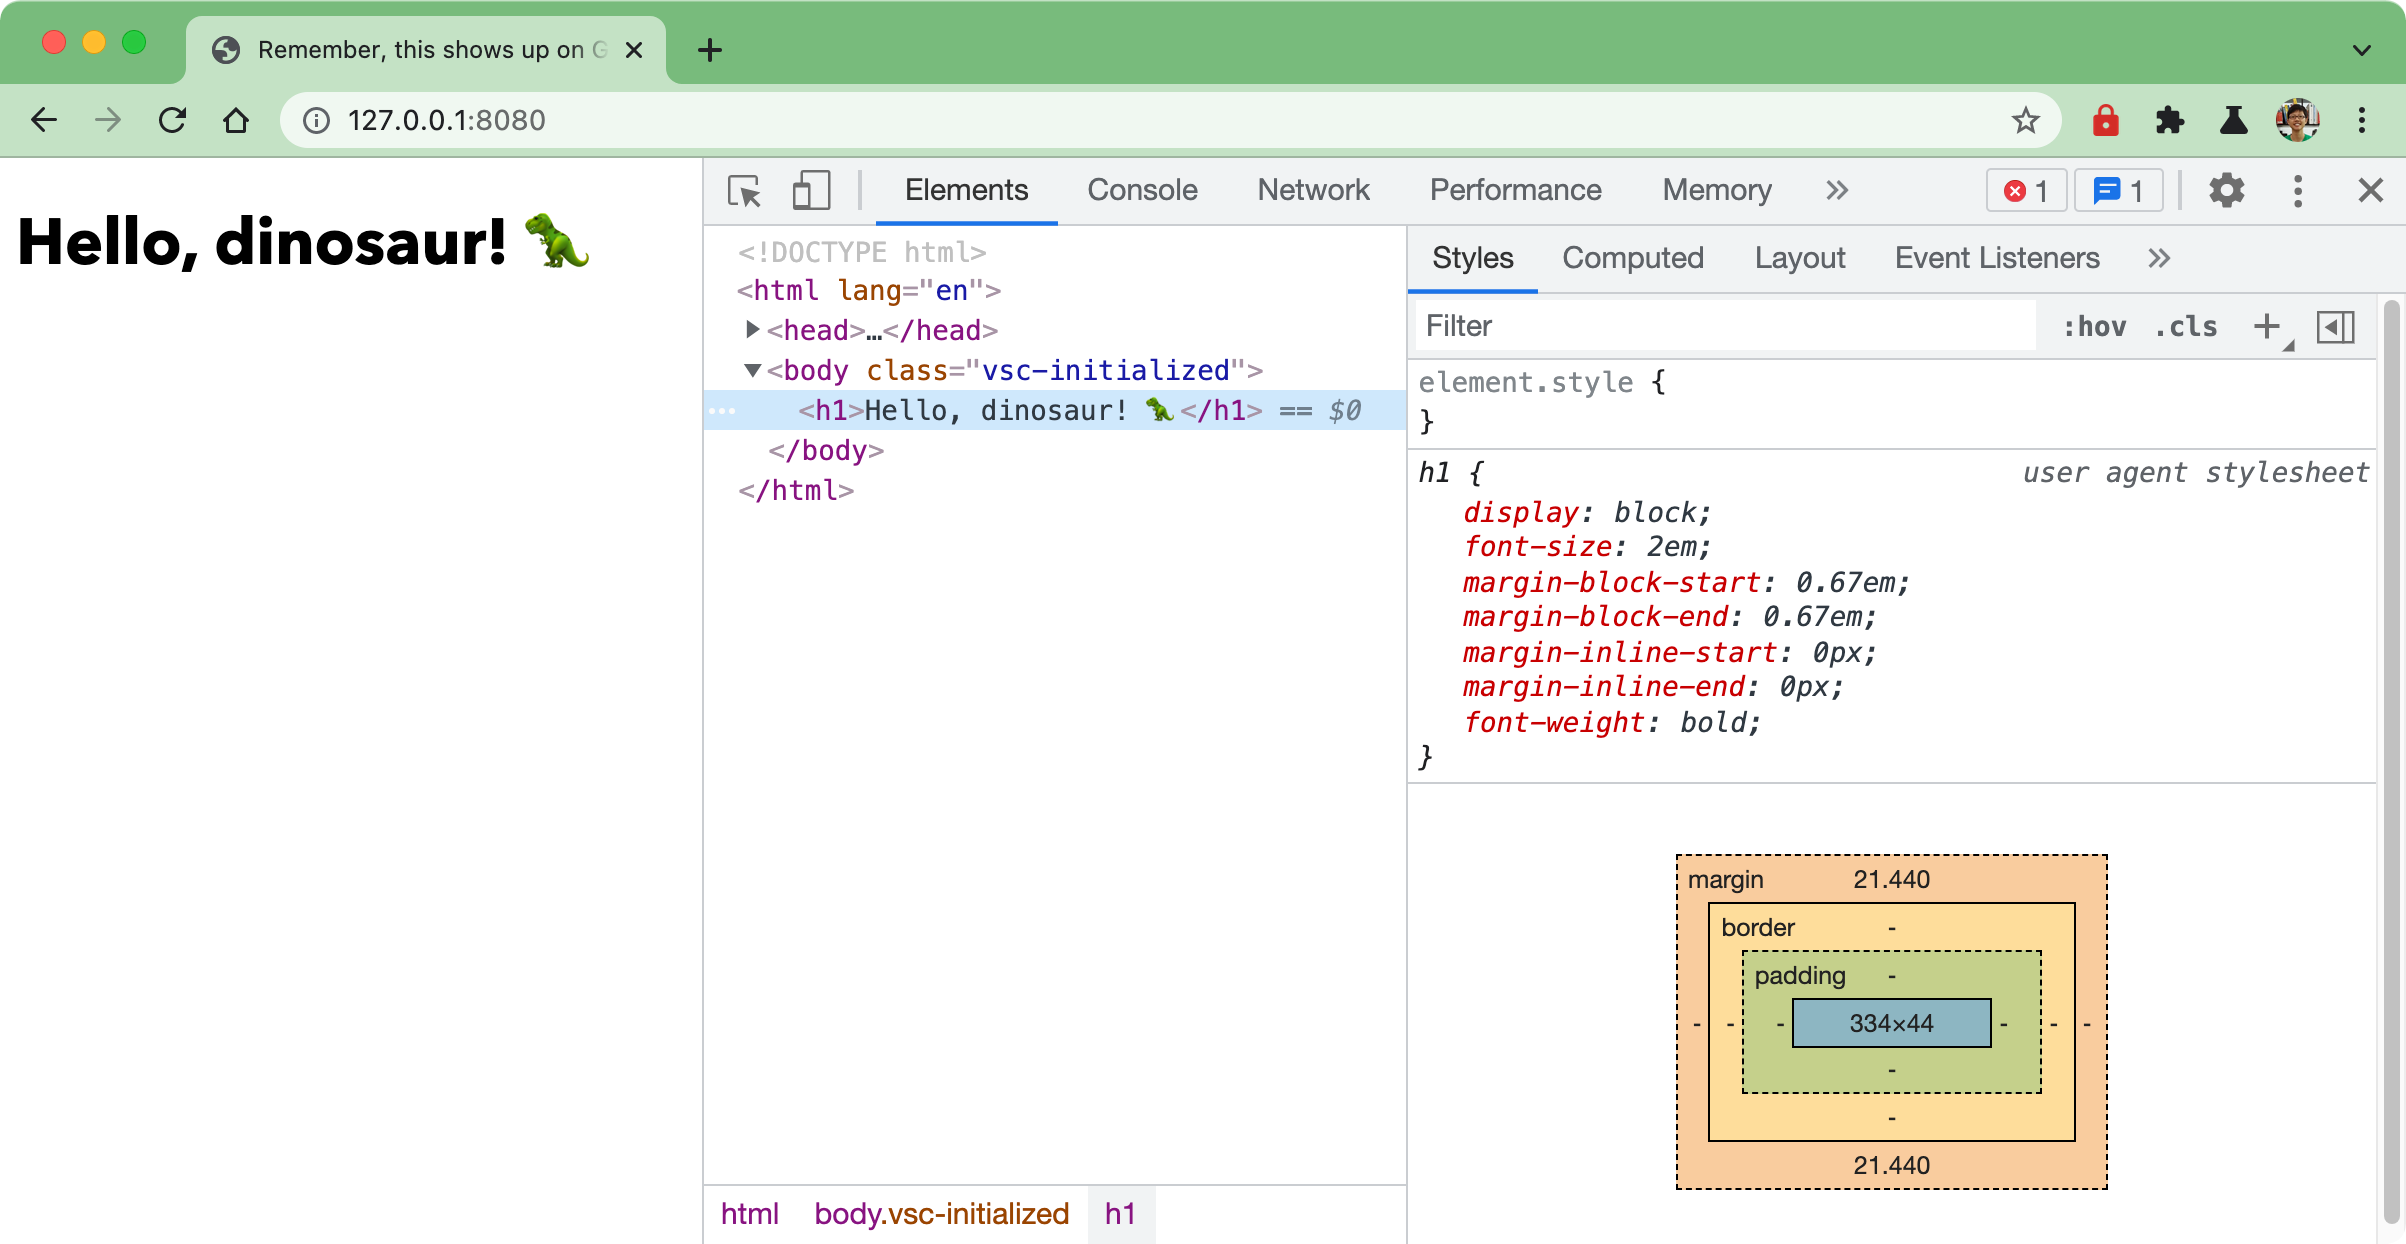
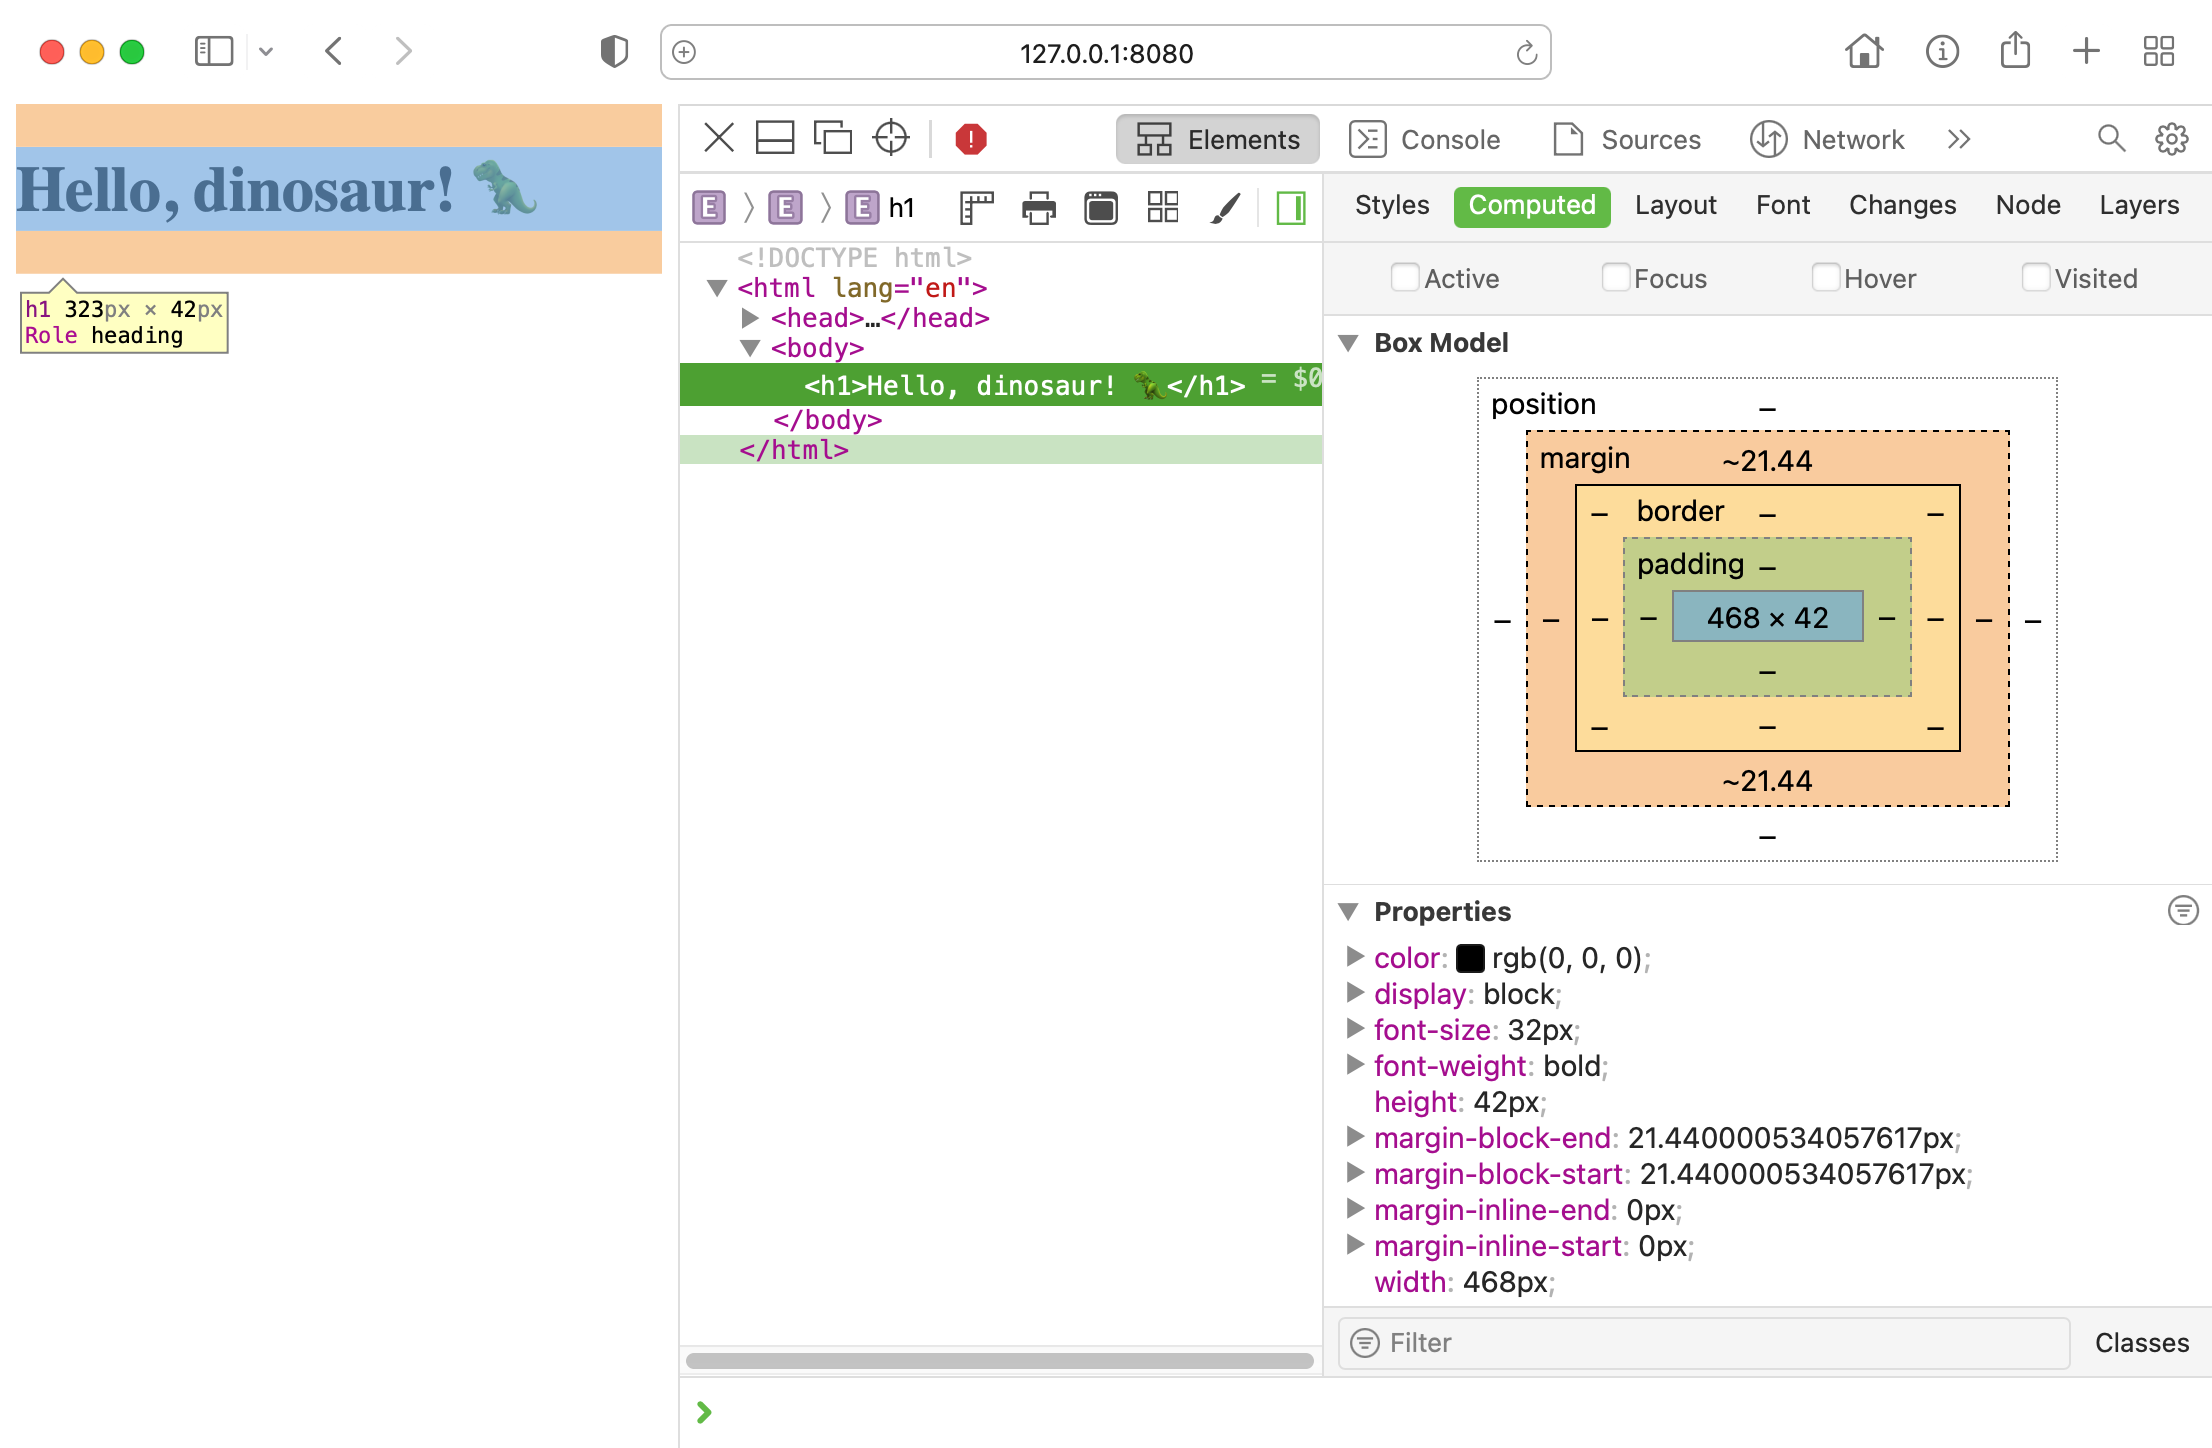
You will notice that each of the Devtools’ box model diagrams have values on the different layers. These are the sizing values of each of the respective layers. And when you hover over any element on the page, you can see the margins and paddings applied highlighted in different colours, if they exist. Formally, the specification describes this model like so:
Each box has a content area (e.g., text, an image, etc.) and optional surrounding padding, border, and margin areas.
Understanding how these layers work will help you figure out the size of your boxes, which is important when you think about laying out all your content on a page, and how things ought to fit together to form a cohesive design.
Content box
The innermost box is called the content box, and this is where the content is bounded. Content could be lines of text or an image, or even some embedded media. You can control the dimensions of this box using the width and height properties.
Padding box
Immediately after the content box comes the padding box. It is, as its name describes, a layer of padding around the content box. You can add padding on either of the four sides of the content box using the padding-top, padding-right ,padding-bottom and padding-left properties.
Border box
You can add borders around elements on your webpage, and any borders applied will come after the padding layer. You can control the style of the borders, in terms of colour and width as well as whether you’d like a solid line or dashed line. The border properties available to you are border-width, border-color and border-style for each of the four sides.
Margin box
The outermost layer in this model is the margin box, and this determines the space beyond the border. This is used for adjusting the space between the box itself and the boxes around it. Like padding and borders, you can control the space on each of the four sides using the margin-top, margin-right ,margin-bottom and margin-left properties.
The difference between margin and padding
Even though both properties introduce spacing between your content itself and anything outside the content box, they behave differently. Padding adds space within the element while margin adds space around the element.
If your element had a border around it, padding would occur within the border while margin occurs outside the border.
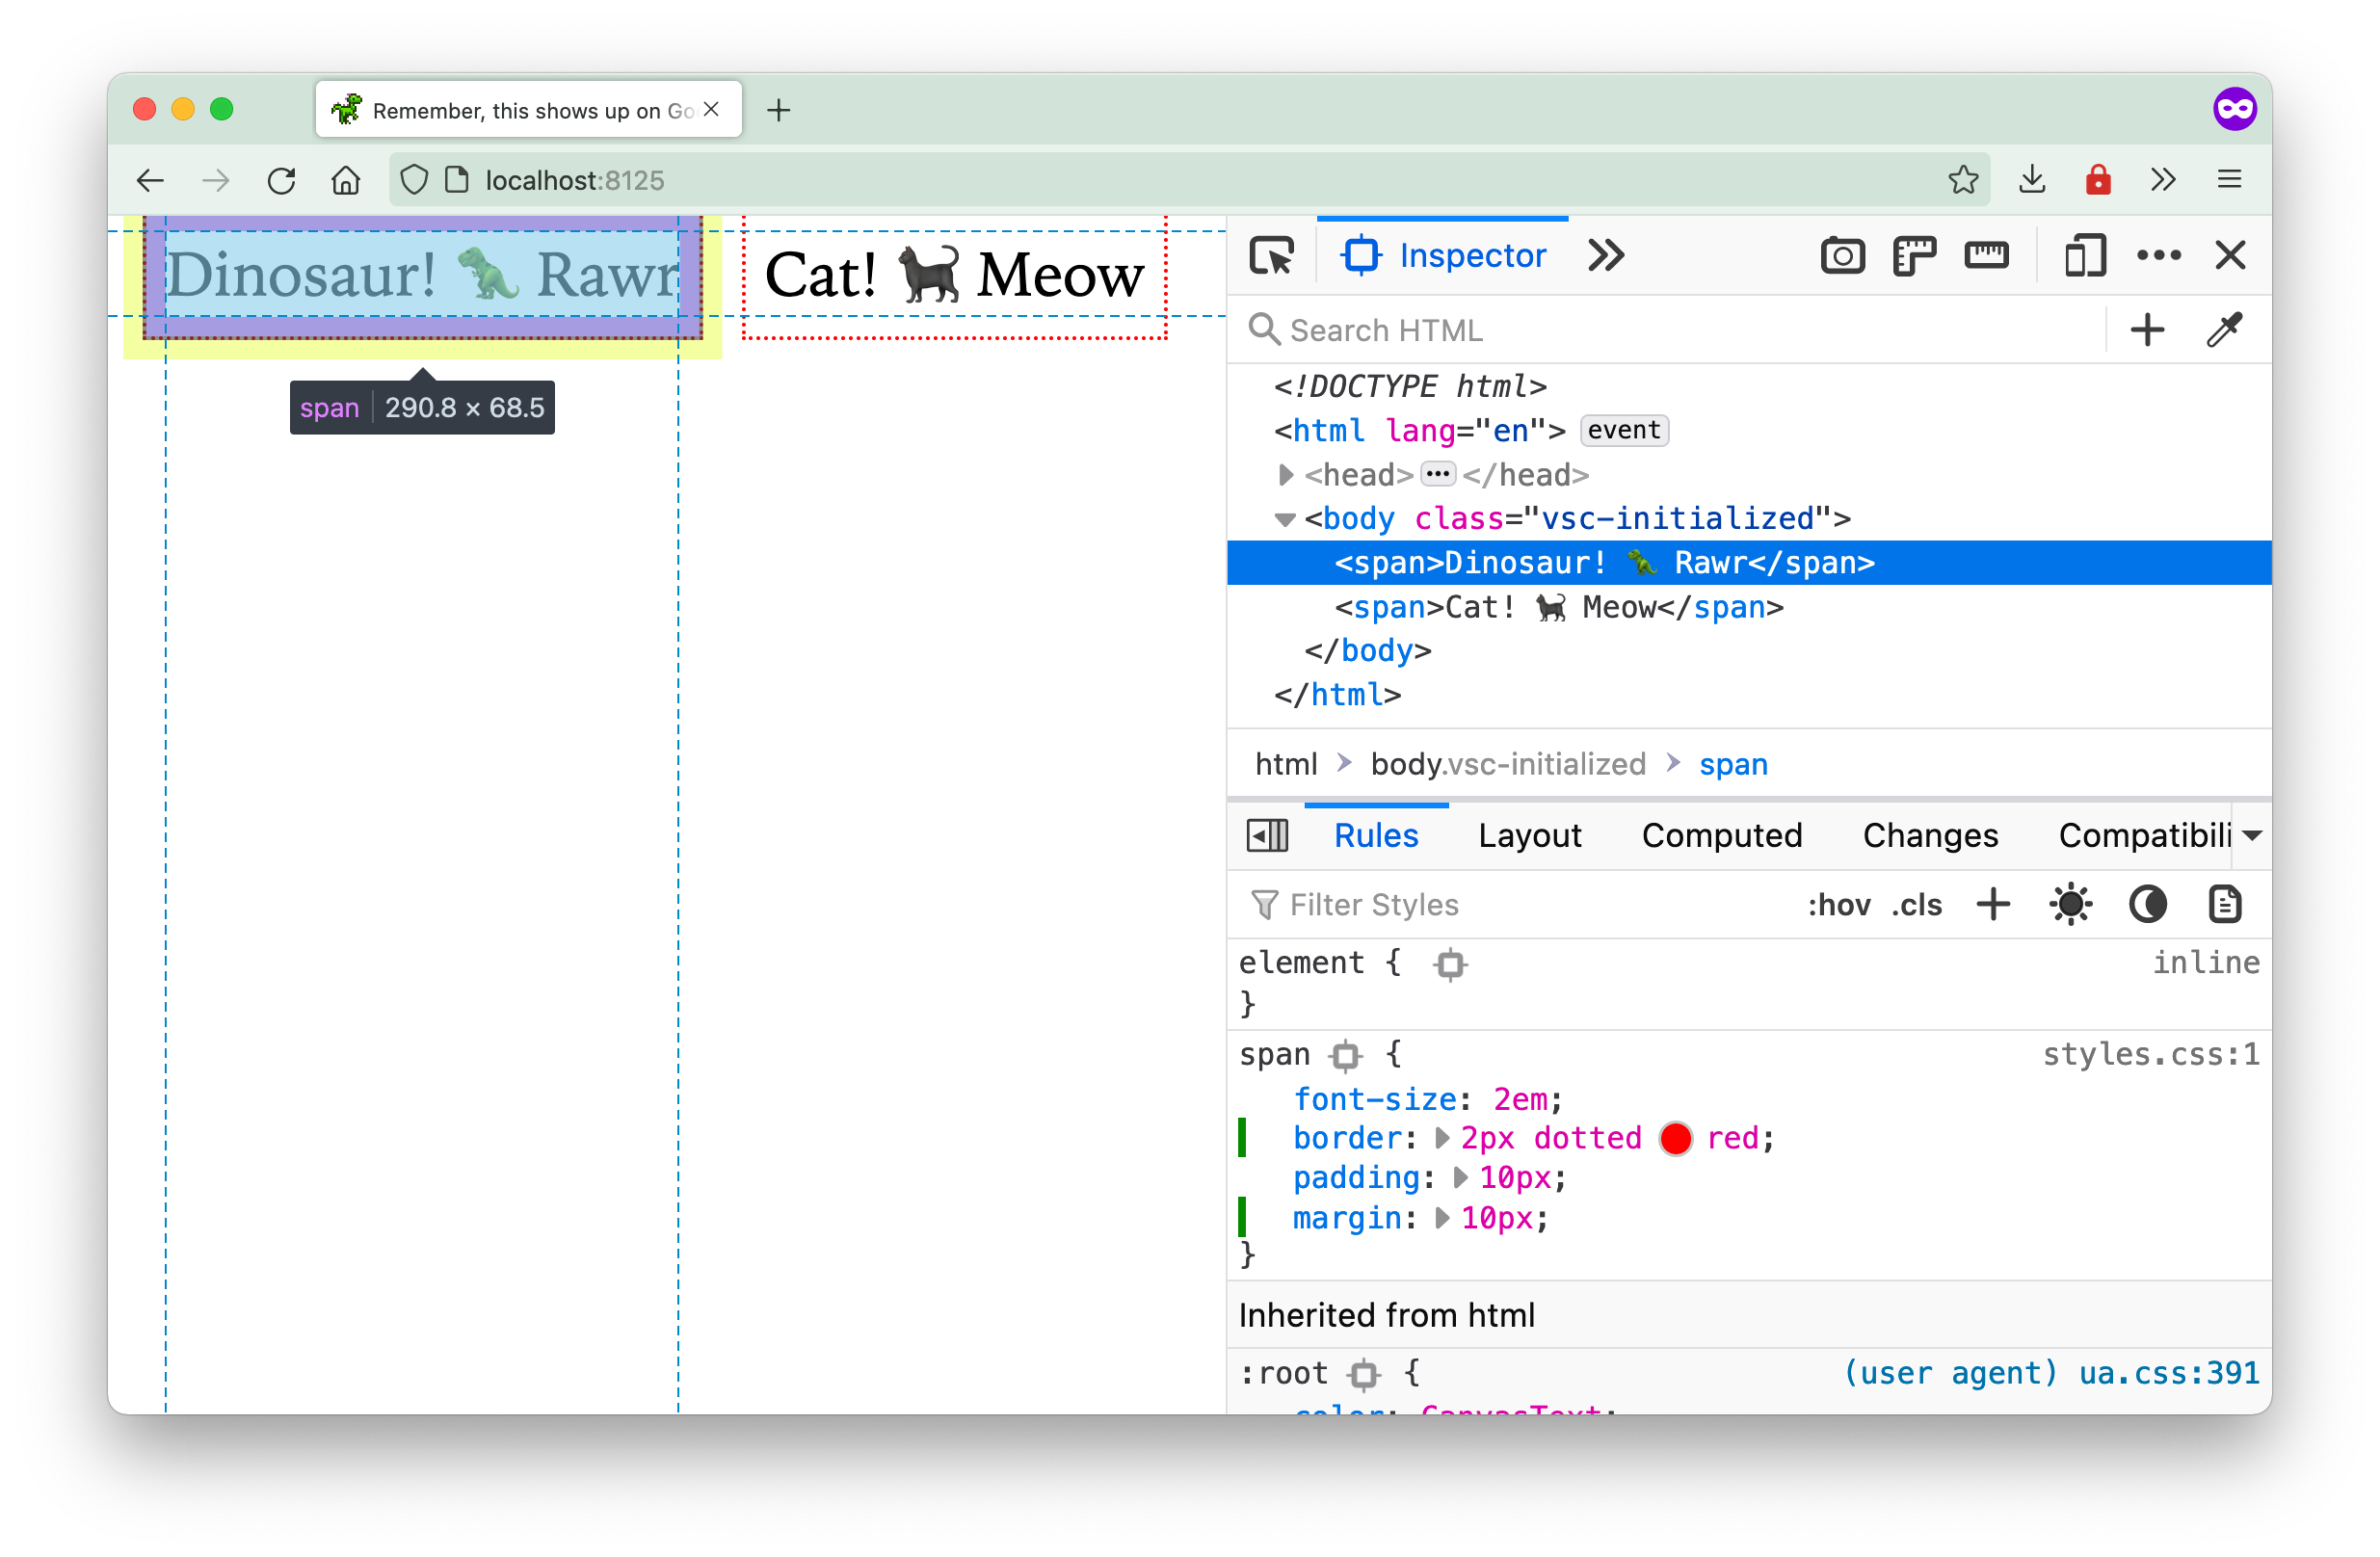
Your browser’s Devtools highlight padding and margin in different colours, which helps when debugging. In addition, having space added within the element means that if the element is a link, the padding area counts as part of the link, but not the margin area.
Welcome! Unfortunately, you don’t have access to this lesson. To get access, please purchase the course or enroll in Magical Dev School.
Unlock this lesson