Astro Recipes
Essential CSS
GTM For Developers
JavaScript Roadmap
Learn JavaScript
Mastering Web Typography
Understanding Async JS
Unorthodox Tailwind
API Masterclass
Build and Deploy
The Beginner Freelancer
Real World Node
Profile Billing Logout
Learn JavaScript
Lesson Plan
  1. JavaScript and its ecosystem
    1. Welcome to Learn JavaScript!
    2. What is JavaScript used for?
    3. The JavaScript ecosystem
    4. Varying versions of JavaScript
  2. JS Basics
    1. Linking your JavaScript file
    2. Preparing your text editor
    3. The Console
    4. Comments
    5. On semicolons
    6. Strings, numbers and booleans
    7. Understanding Variables
    8. Understanding Functions
    9. The Flow of a Function
    10. Arrow functions
    11. Intro to objects
    12. If/else statements
    13. Comparing Objects
    14. The NOT operator
    15. Null and Undefined
    16. The BOM and the DOM
    17. Selecting an Element
    18. Changing Classes
    19. Listening to events
    20. Callbacks
  3. Building simple components
    1. How to think like a developer
    2. Starter files and Source codes
    3. Do this for every component
    4. 🛠 Off-canvas menu: Building an off-canvas menu
    5. 🛠 Modal: Building a Modal
    6. Lessons from the building process
    7. Debugging errors
    8. How to use a linter
  4. Arrays and loops
    1. Introduction to Arrays
    2. Array methods
    3. For loops
    4. The forEach loop
    5. Selecting multiple elements
    6. Nodes vs Elements
    7. 🛠 Accordion: Building an accordion
  5. Dom basics
    1. Id, classes, attributes, and tags
    2. Changing CSS with JavaScript
    3. Getting CSS with JavaScript
    4. Changing Attributes
    5. Finding an element's size and position
    6. DOM Traversals
    7. 🛠 Tabby: Building Tabby (A Tabbed component)
    8. 🛠 Carousel: HTML and CSS
    9. 🛠 Carousel: Switching slides with JavaScript
    10. 🛠 Carousel: Working the dots
    11. 🛠 Carousel: Positioning slides with JavaScript
  6. Events deep dive
    1. The listening element
    2. Default Behaviors
    3. Event propagation
    4. Event delegation
    5. Removing Event Listeners
    6. 🛠 Modal: Closing the modal
    7. 🛠 Accordion: Event delegation
    8. 🛠 Tabby: Event delegation
    9. 🛠 Carousel: Event delegation
  7. Transitions and Animations
    1. CSS Transitions
    2. CSS Animations
    3. Silky-smooth animations
    4. Integrating CSS transitions and animations with JavaScript
    5. Animating with JavaScript
    6. GreenSock Animation API (GSAP)
    7. 🛠 Off-canvas menu: Animations
    8. 🛠 Modal: Animating the modal
    9. 🛠 Modal: Animating the pointing hand
    10. 🛠 Modal: Animating the waving hand
    11. 🛠 Modal: Wave hand animation with JavaScript (using GSAP)
    12. 🛠 Accordion: Animations
    13. 🛠 Carousel: Animations
  8. Useful JS features
    1. Ternary operators
    2. AND and OR operators
    3. Early returns
    4. Template Literals
    5. Destructuring
    6. Default parameters
    7. Enhanced Object Literals
    8. Rest and Spread
    9. Useful array methods
    10. Looping through objects
    11. Returning objects with implicit return
    12. 🛠 Accordion: Using useful JavaScript features
    13. 🛠 Tabby: Using useful JavaScript features
    14. 🛠 Carousel: Useful JavaScript features
  9. JS Best practices
    1. Write declarative code
    2. Functions with a purpose
    3. Manage scope
    4. Reduce state changes
    5. Don't reassign
    6. Don't mutate
    7. Preventing Objects from mutating
    8. Preventing Arrays from mutating
    9. Write pure functions
    10. 🛠 Accordion: Refactor
    11. 🛠 Carousel: First refactor
    12. 🛠 Carousel: Refactoring the dots part
    13. 🛠 Carousel: Previous and next buttons
    14. 🛠 Carousel: Second refactor
  10. Manipulating text and content
    1. Changing Text and HTML
    2. Creating HTML Elements
    3. Adding multiple elements to the DOM
    4. Removing Elements from the DOM
    5. 🛠 Carousel: Creating dots with JavaScript
    6. 🛠️ Calculator: HTML and CSS
    7. 🛠️ Calculator: Happy Path
    8. 🛠️ Calculator: Testing the Happy Path
    9. 🛠️ Calculator: Easy Edge Cases
    10. 🛠️ Calculator: Difficult Edge Cases
    11. 🛠️ Calculator: Refactoring
    12. The switch statement
    13. 🛠️ Calculator: Refactoring (Part 2)
    14. 🛠️ Popover: Making one popover
    15. 🛠️ Popover: Making four popovers
    16. 🛠️ Popover: Making popovers with JavaScript
  11. Handling Forms
    1. Intro to forms
    2. Selecting form fields with JavaScript
    3. Form fields and their events
    4. Sanitize your output
    5. Generating unique IDs
    6. 🛠️ Popover: Dynamic ID
    7. 🛠️ Todolist: The HTML and CSS
    8. 🛠️ Todolist: Creating tasks with JavaScript
    9. 🛠️ Todolist: Deleting tasks with JavaScript
    10. 🛠️ Typeahead: The HTML and CSS
    11. 🛠️ Typeahead: Displaying predictions
    12. 🛠️ Typeahead: Selecting a prediction
    13. 🛠️ Typeahead: Bolding search terms
  12. Handling Dates
    1. The Date object
    2. Getting a formatted date
    3. Getting the time
    4. Local time and UTC Time
    5. Setting a specific date
    6. Setting a date with Date methods
    7. Adding (or subtracting) date and time
    8. Comparing Dates and times
    9. 🛠️ Datepicker: HTML and CSS
    10. 🛠️ Datepicker: Building the calendar
    11. 🛠️ Datepicker: Building the datepicker with JavaScript
    12. 🛠️ Datepicker: Previous and Next buttons
    13. 🛠️ Datepicker: Selecting a date
    14. 🛠️ Datepicker: Positioning the datepicker
    15. 🛠️ Datepicker: Showing and hiding
    16. Formatting a date with toLocaleString
    17. setTimeout
    18. setInterval
    19. 🛠️ Countdown timer: HTML and CSS
    20. 🛠️ Countdown timer: JavaScript
    21. 🛠️ Countdown timer: Counting Months
    22. 🛠️ Countdown timer: Daylight Saving Time
    23. 🛠️ Countdown timer: Counting Years
  13. Async JS
    1. Introduction to Ajax
    2. Understanding JSON
    3. The Fetch API
    4. Possible data types
    5. JavaScript Promises
    6. Requests and responses
    7. Sending a POST request
    8. Authentication
    9. Handling errors
    10. Viewing response headers
    11. CORS and JSONP
    12. XHR vs Fetch
    13. Using an Ajax library
    14. Reading API documentation
    15. Understanding curl
    16. 🛠️ Todolist: The Todolist API
    17. 🛠️ Todolist: Fetching tasks
    18. 🛠️ Todolist: Creating tasks
    19. 🛠️ Todolist: Editing tasks
    20. 🛠️ Todolist: Deleting tasks
    21. 🛠️ Todolist: Creating tasks with Optimistic UI
    22. 🛠️ Todolist: Handling Optimistic UI errors
    23. 🛠️ Todolist: Editing tasks with Optimistic UI
    24. 🛠️ Todolist: Deleting tasks with Optimistic UI
    25. 🛠️ Todolist: Refactor
    26. 🛠️ Typeahead: How to add Ajax
    27. 🛠️ Typeahead: Adding Ajax
    28. 🛠️ Typeahead: Handling errors
    29. 🛠️ Google Maps Clone: Creating your first Google Map
    30. 🛠️ Google Maps Clone: Fetching JSONP via JavaScript
    31. 🛠️ Google Maps Clone: Drawing directions
    32. 🛠️ Google Maps Clone: Driving directions
    33. 🛠️ Google Maps Clone: Handling errors
    34. 🛠️ Google Maps Clone: Adding stopovers
    35. 🛠️ Google Maps Clone: Refactor
  14. Advanced Async JS
    1. Requesting many resources at once
    2. Asynchronous functions
    3. Handling multiple awaits
    4. Asynchronous loops
    5. 🛠️ Dota Heroes: Listing heroes
    6. 🛠️ Dota Heroes: Filtering heroes (Part 1)
    7. 🛠️ Dota Heroes: Filtering heroes (Part 2)
    8. 🛠️ Dota Heroes: Refactoring
    9. 🛠️ Dota Heroes: Hero Page
    10. 🛠️ Dota Heroes: Making the hero page robust
    11. 🛠️ Dota Heroes: Heroes page refactor
  15. Handling Keyboard Events
    1. Keyboard users
    2. Handling commonly used keys
    3. Keyboard events
    4. Understanding Tabindex
    5. Detecting the focused element
    6. Directing focus
    7. Preventing people from tabbing into elements
    8. How to choose keyboard shortcuts
    9. Creating single-key shortcuts
    10. 🛠️ Off-canvas: Adding keyboard interaction
    11. 🛠️ Modal: Adding keyboard interaction
    12. 🛠️ Accordion: Adding keyboard interaction
    13. 🛠️ Tabby: Adding keyboard interaction
    14. 🛠️ Tabby: Refactoring
    15. 🛠️ Carousel: Adding keyboard interaction
    16. 🛠️ Carousel: Displaying help text
    17. 🛠️ Calculator: Adding keyboard interaction
    18. 🛠️ Popover: Keyboard
    19. 🛠️ Popover: Refactor
    20. Keyboard shortcuts with Command and Control modifiers
    21. 🛠️ Todolist: Keyboard
    22. 🛠️ Typeahead: Keyboard
    23. 🛠️ Typeahead: Selecting a prediction with the keyboard
    24. 🛠️ Google Maps Clone: Keyboard
    25. 🛠️ Dota Heroes: Keyboard
    26. 🛠️ Datepicker: Tabbing in and out
    27. 🛠️ Datepicker: Keyboard shortcuts
  16. Screen reader accessibility
    1. What is accessibility?
    2. How to use a screen reader
    3. Using NVDA
    4. Using Voiceover
    5. Aria roles
    6. Landmark roles
    7. Document structure roles
    8. Live region roles
    9. Widget roles
    10. Window and Abstract roles
    11. Accessible names and descriptions
    12. Hiding content
    13. ARIA properties and ARIA states
    14. ARIA for expandable widgets
    15. 🛠️ Off-canvas: Accessibility
    16. ARIA for modal dialogs
    17. 🛠️ Modal: Screen reader accessibility
    18. 🛠️ Accordion: Screen reader accessibility
    19. ARIA for Tabbed components
    20. 🛠️ Tabby: Screen reader accessibility
    21. 🛠️ Tabby: Refactor
    22. 🛠️ Carousel: Screen reader accessibility
    23. Roles that trigger Forms and Application modes
    24. What's next for accessibility?
  17. Handling Scroll
    1. The Scroll event
    2. 🛠️ Auto-hiding Sticky-nav: HTML and CSS
    3. 🛠️ Auto-hiding Sticky-nav: JavaScript
    4. 🛠️ Auto-hiding Sticky-nav: Natural reveal
    5. Intersection Observer API
    6. Intersection Observer Options
    7. 🛠️ Slide & Reveal
    8. 🛠️ Slide & Reveal: Always fade-in when you scroll down
    9. 🛠️ Slide & Reveal: Fine-tuning the animation
    10. 🛠️ Infinite Scroll: Anatomy
    11. 🛠️ Infinite Scroll: Infinite load
    12. 🛠️ Infinite Scroll: Refactor
    13. 🛠️ Infinite Scroll: Implementing the Infinite Scroll
  18. Mouse, Touch, and Pointer events
    1. Mouse Events
    2. 🛠️ Spinning Pacman: HTML and CSS
    3. 🛠️ Spinning Pacman: JavaScript
    4. Touch events
    5. Pointer events
    6. Touch-action
    7. 🛠️ Spinning Pacman: Supporting Touch
    8. Cloning elements
    9. 🛠️ DragDrop: HTML and CSS
    10. 🛠️ DragDrop: JavaScript
    11. 🛠️ DragDrop: Creating a drop preview
    12. 🛠️ DragDrop: Sortable drop preview
    13. 🛠️ DragDrop: Robustness
    14. 🛠️ DragDrop: Refactor
  19. Object Oriented Programming
    1. Before we begin
    2. What is Object Oriented Programming?
    3. Four Flavours of Object Oriented Programming
    4. Inheritance
    5. This in JavaScript
    6. Call, bind, apply
    7. Creating Derivative Objects
    8. Composition vs Inheritance
    9. Polymorphism
    10. Encapsulation
    11. Closures
    12. Encapsulation in Object Oriented Programming
    13. Getters and Setters
    14. What OOP flavour to use
    15. When to use Object Oriented Programming
  20. Writing reusable code
    1. Creating reusable code by writing libraries
    2. Two Types of libraries
    3. Including libraries with Script tags
    4. Including libraries with ES6 Modules
    5. Dynamic imports
    6. 🛠️ Off Canvas: Building a Library
    7. 🛠️ Modal: Library setup
    8. 🛠️ Modal: Opening the Modal
    9. 🛠️ Modal: Closing the modal
    10. 🛠️ Modal: Inheritance and Polymorphism
    11. 🛠️ Modal: Resolving differences between subclasses
    12. 🛠️ Modal: Exposing properties and methods
    13. 🛠️ Accordion: Building a library
    14. 🛠️ Tabby: Building a library
    15. 🛠️ Carousel: Building a library
    16. 🛠️ Calculator: Library
    17. 🛠️ Calculator: Fixing the Clear Key
    18. 🛠️ Calculator: Handling other keys
    19. 🛠️ Calculator: State
    20. 🛠️ Popover: Library
    21. 🛠️ Popover: Adding event listeners
    22. 🛠️ Typeahead: Library
    23. 🛠️ DatePicker: Library
  21. Going from Vanilla JS to JS Frameworks
    1. 🛠️ Building a Tiny framework
    2. 🛠️ Tiny: Add event listeners
    3. 🛠️ Tiny: Updating state
    4. 🛠️ Tiny: Rendering Child Components
    5. 🛠️ Tiny: Changing Parent State
    6. 🛠️ Tiny: Passing Props
    7. 🛠️ Tiny: Multiple Props
    8. 🛠️ Tiny: Passing values from sibling components
    9. 🛠️ Tiny: Mounting
    10. 🛠️ Tiny: Passing props to descendants
    11. 🛠️ Tiny: A tiny refactor
  22. Single Page Apps
    1. What is a Single Page App?
    2. Simple SPA using only CSS
    3. The Location Interface
    4. The History Interface
    5. Minimum viable server for a SPA
    6. 🛠️ Dota SPA: Introduction
    7. 🛠️ Dota SPA: Building The Heroes List
    8. 🛠️ Dota SPA: Building the filters
    9. 🛠️ Dota SPA: Filtering heroes
    10. 🛠️ Dota SPA: Displaying filtered heroes
    11. 🛠️ Dota SPA: Getting Ready to build the Hero Page
    12. 🛠️ Dota SPA: Building the hero page
    13. 🛠️ Dota SPA: Lore and abilities
    14. 🛠️ Dota SPA: Routing for Single-page apps

Adding multiple elements to the DOM

4m:18s

You want to use appendChild or insertBefore as little as possible because it’s an expensive process to add elements to the DOM—everything after the element you added needs to be repainted by the browser.

const devs = ['Addy Osmani', 'Vitaly Friedman', 'Chris Coyier']
// Don't do this! It causes the DOM to update three times
const ol = document.querySelector('ol')
devs.forEach(dev => {
const li = document.createElement('li')
li.innerHTML = dev
ol.appendChild(li)
})

There are two better ways to add multiple elements to the DOM.

  1. Replacing innerHTML
  2. Appending a document fragment

Replacing innerHTML

You can change multiple elements at once by changing the element’s innerHTML.

For example, let’s say you want to add three developers to an empty list.

<ol></ol>

You can change <ol>’s innerHTML directly.

const ol = document.querySelector('ol')
ol.innerHTML = `
<li>Addy Osmani</li>
<li>Vitaly Friedman</li>
<li>Chris Coyier</li>
`

And you’ll get this:

<ol>
<li>Addy Osmani</li>
<li>Vitaly Friedman</li>
<li>Chris Coyier</li>
</ol>

Manipulating arrays into a HTML string

In reality, you’ll probably have an array that contains devs you wanted to add to the DOM.

const devs = ['Addy Osmani', 'Vitaly Friedman', 'Chris Coyier']

To create the HTML string, you can use map and join. Let’s talk about join since you haven’t learned it yet.

join combines every item in an array into a string. If you call join without any arguments, your items will be joined by a comma.

const string = devs.join()
console.log(string) // AddyOsmani,Vitaly Friedman,Chris Coyier

If you want to join items without a separator, you can use an empty string.

const string = devs.join('')
console.log(string) // Addy OsmaniVitaly FriedmanChris Coyier

To produce the HTML string, you want to use map to modify each array item into a list. Then, use join to convert the array into a string.

const string = devs.map(dev => `<li>${dev}</li>`).join('')
console.log(string)
// <li>Addy Osmani</li><li>Vitaly Friedman</li><li>Chris Coyier</li>

Once you have the final HTML String, you can change the innerHTML.

ol.innerHTML = string

What if you have existing items in the list?

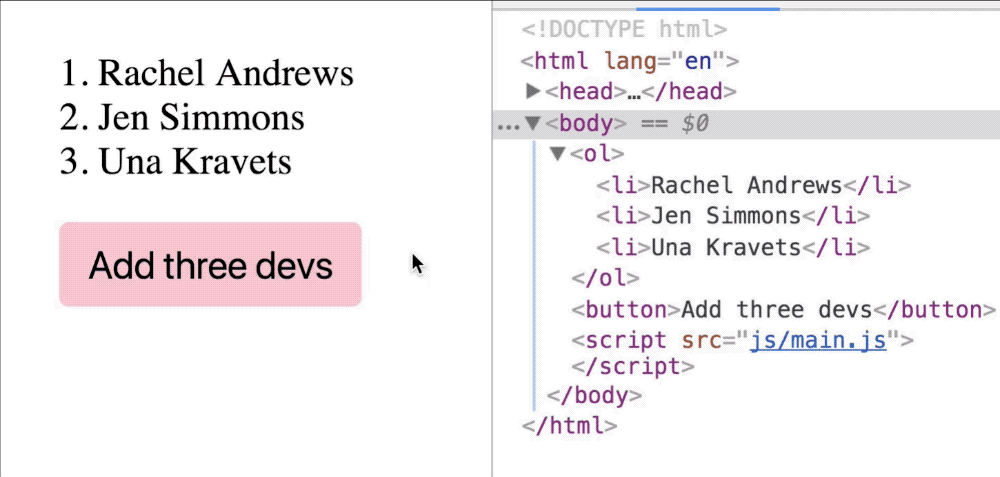
Let’s say you have three developers in your list and you want to add three more developers to it.

<ol>
<li>Rachel Andrew</li>
<li>Jen Simmons</li>
<li>Una Kravets</li>
</ol>
// Devs to add to <ol>
const devs = ['Addy Osmani', 'Vitaly Friedman', 'Chris Coyier']

You can add the string to the original ol.innerHTML.

const string = devs.map(dev => `<li>${dev}</li>`).join('')
ol.innerHTML = ol.innerHTML + string

The downside of this approach? You replace the entire list. The GIF below proves that the first three items are also replaced even though they’re not changed.

The <ol> and all <li> elements flashed when the button was clicked, indicating that there was a change

A better approach to add multiple items is through a document fragment.

Using a document fragment

A document fragment is like a separate DOM that lives only in JavaScript. It functions exactly like the DOM.

To create a document fragment, you use createDocumentFragment.

const fragment = document.createDocumentFragment()

Document fragments can be treated like the DOM. That means you can add elements to the fragment with appendChild and insertBefore. Any changes you make to the fragment will not be reflected in the DOM (and hence not expensive) until you add the fragment into the DOM.

// DOM doesn't change with this code
devs.forEach(dev => {
const li = document.createElement('li')
li.innerHTML = dev
fragment.appendChild(li)
})

You can add the fragment to the DOM with appendChild or insertBefore when you’re ready.

ol.appendChild(fragment)

In this case, you can see from the GIF that the first three elements remain. You only added three more items into the list.

The last three <li> elements flashed which means only the last three elements changed; the rest didn't.

Exercise

Say you have the following HTML:

<div class="characters">
<ul class="elves">
<li>Legolas</li>
<li>Arwen Evenstar</li>
</ul>
</div>

Do these with both methods you learned:

  1. Add a list of humans to .characters. This list should have a humans class and contains five list items—Gandalf, Saruman, Aragorn, Boromir, and Faramir.
  2. Add two list items—Glorfindel and Elrond—before Arwen Evenstar. Use the document fragment method.